In a series of posts I will show you how to make a maze in a wide variety of design constructions. The 21st type of maze construction is the Warp Zone maze. Let’s define what I mean, then get into the example. Every example will use the sample basic outline (the state of Ohio) to better illustrate the differences between each maze type.
Warp Zone Maze - A maze that contains warp zones that allow the solver to move across the maze with no regard to walls. Another construction difference from other mazes is that sections of the maze may be completely closed from entry without using the warp zones.
How to Make a Warp Zone Maze
Step 1 - Draw the Outline
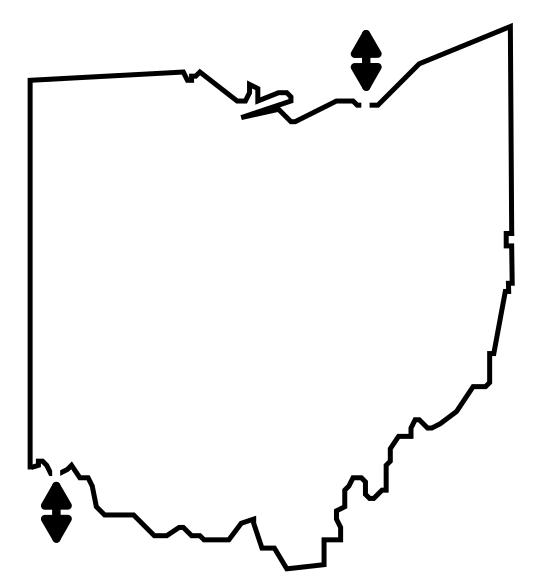
The outline of the maze makes the outer wall of the maze. It can be anything from a simple shape like a square, to a complex picture. The outline should be thicker than the internal lines to give the maze definition. In the example below I chose the state of Ohio.
Step 1.5 - Choose the Start and Goal
For the below example I chose the start of Cleveland and the goal of Cincinnati.

NOTE : Steps 2, 3, and 4 May be completed in any order
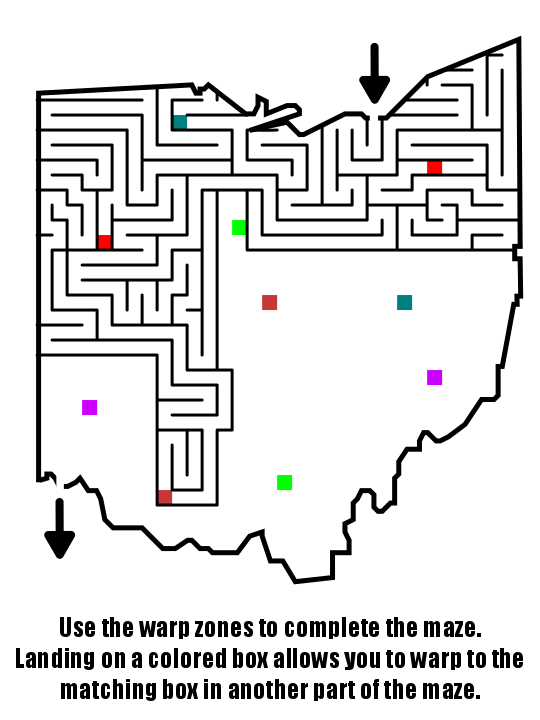
Step 2 - Draw the Warp Zones and Instructions
Create warp zones within the maze that will allow the maze solver to jump to different parts of the maze. Also add instructions to explain the warp rules. The more warp zones you create, the more complex the maze can become. For this example I used colored boxes, but any shape could work. If you are limited to black and white a variety of shapes and symbols could also be used to signify warp zones (Triangle, square, circle, diamond, etc.), or you could simply use letters of the alphabet.
Although you cannot see the guide grid I was using in the example, each warp zone was placed within a grid space so it will align with the maze pathways I make in future steps.

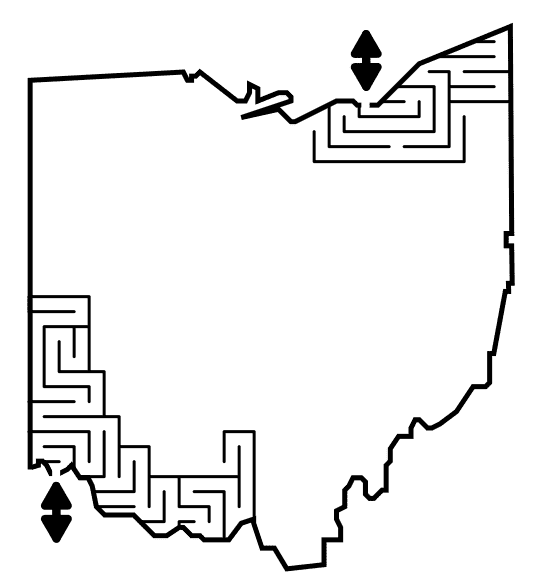
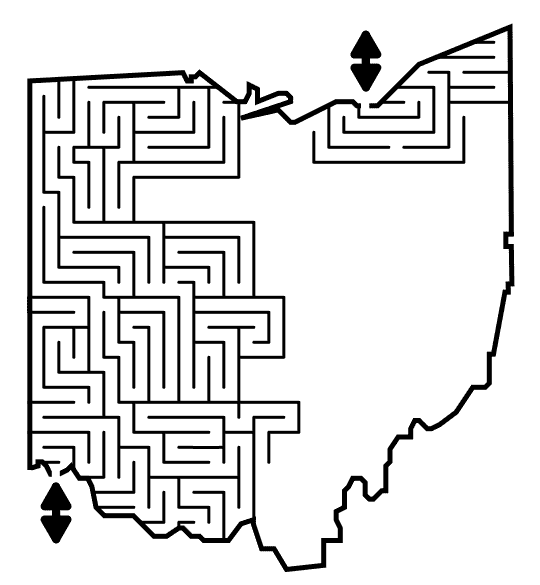
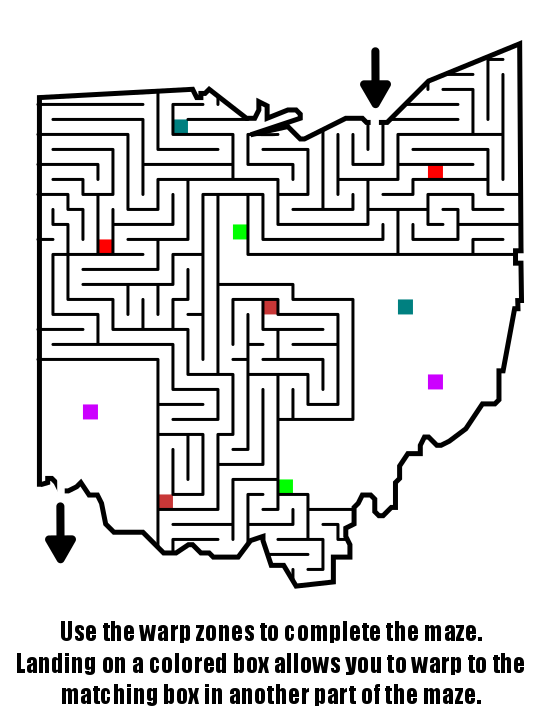
Step 3 - Draw the First Maze Section
Draw walls to create the first section of the maze. Unlike other mazes, because of the warp zones, these sections can be completely closed ! In fact, I suggest they are closed to take full advantage of the warp aspect of the maze. For my example below I used a standard path maze and completely closed the first section. The only exits from this section will come from one of the two warps. I also want to point out that each warp in this section was NOT placed at a dead end but rather in the middle of a continuing pathway. Although this section does not use it, in the future you may want to include multiple warps on a pathway to add more choice for the solver (just because you go over a warp does not mean you have to take it).

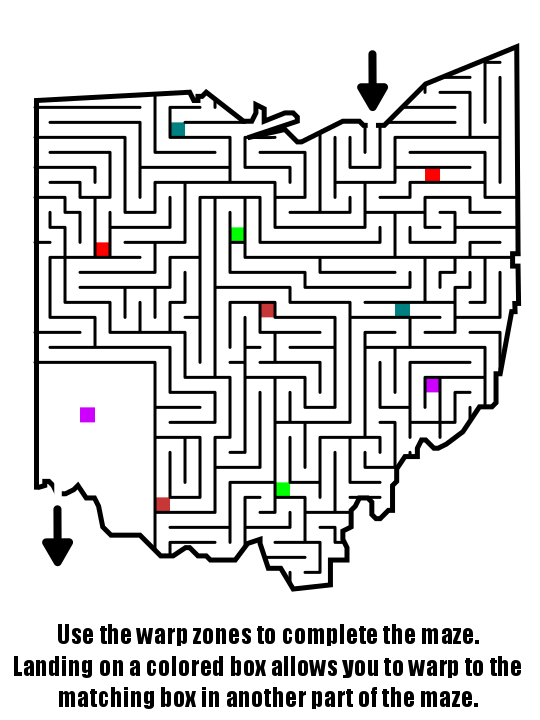
Step 4 - Add Additional Sections
I create a Warp Zone maze one section at a time. The first section below connects the initial red warp zone block to the other red block. This connects to the brown warp zone in addition to many dead ends. As you make a Warp Zone maze have an idea of what order you want the solver to take.
The third section connecting brown warp zones was drawn next (leading to a dead end). So Red to Brown to Dead End is not going to work.
The fourth and fifth sections connect the blue to green, and then the green to the purple.
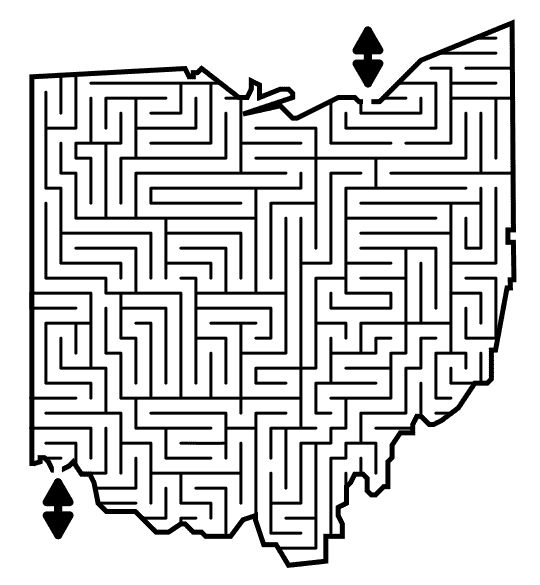
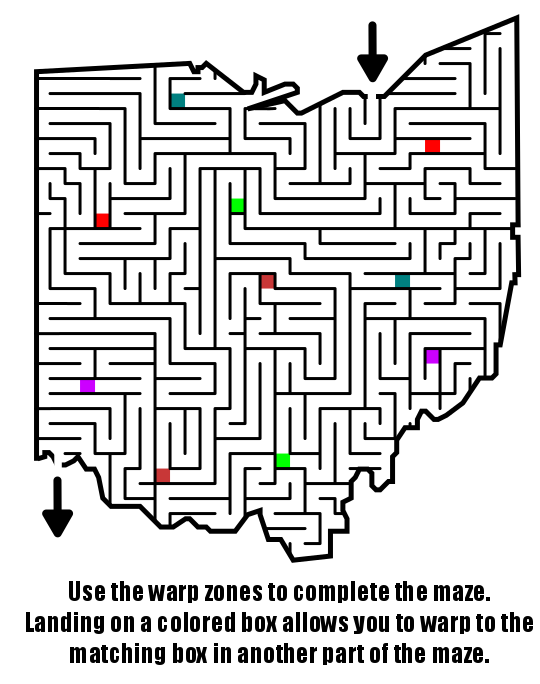
Step 5 - Complete the Maze
Draw all sections of the maze to complete the maze.
Step 6 - Make the Maze Solution
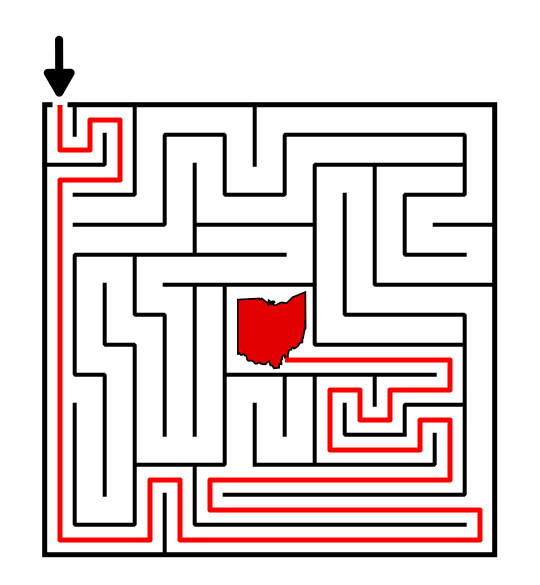
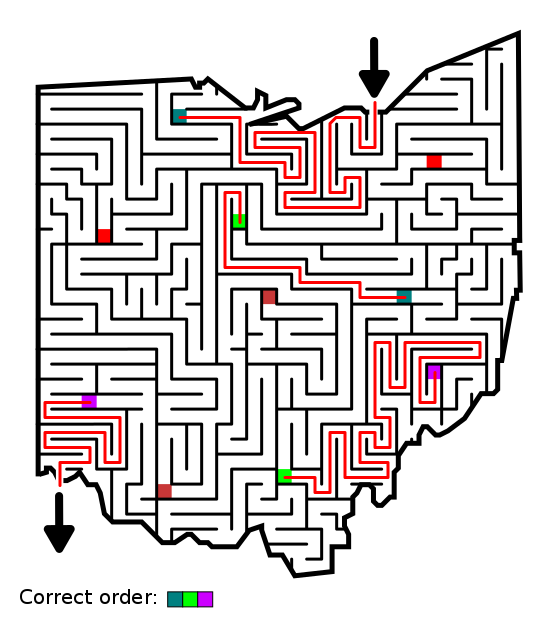
Highlight the correct path in the final version of the maze to create the final Maze solution (shown here in red). For a Warp Zone maze you should also note the correct order of the warps !! The solution pathway will look very different than most mazes you create. If you think there could be any confusion with the answer, write out the color sequence of number the pathways to add clarity. In my example I believe the solution is clear, but I added a note at the bottom just in case !
Additional Warp Zone Examples
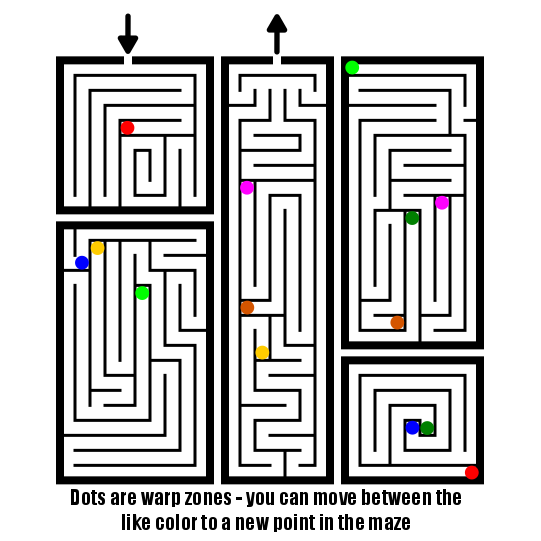
Here is a another example of a warp zone maze in a standard path format. This example uses dots for warps.

My second warp zone example includes a variety of sections where warp zones are vital to moving between them. In some ways this makes the solving easier since you could figure out sequences of warps before solving. Look back at first example above and notice without sections the solver has no idea which warp to travel to first since each is possible. The best way to counteract this is to add more warps as I did below.
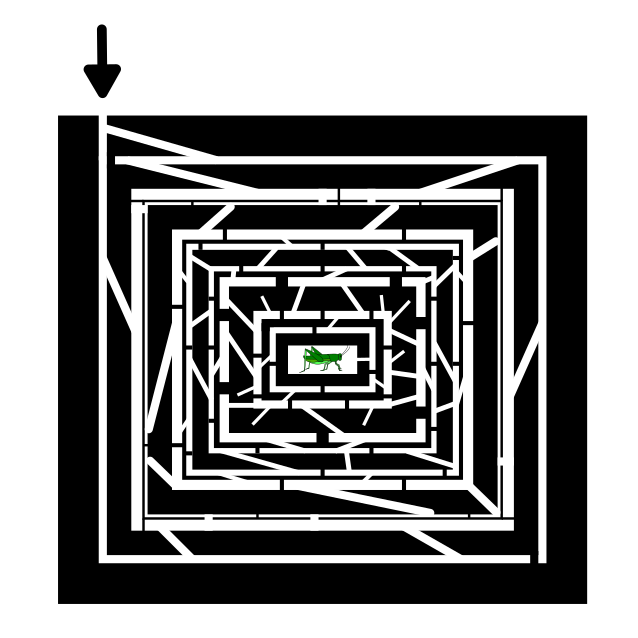
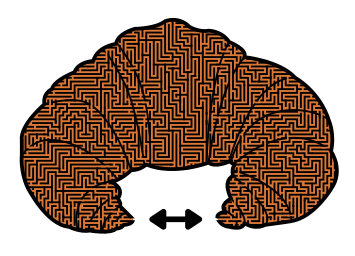
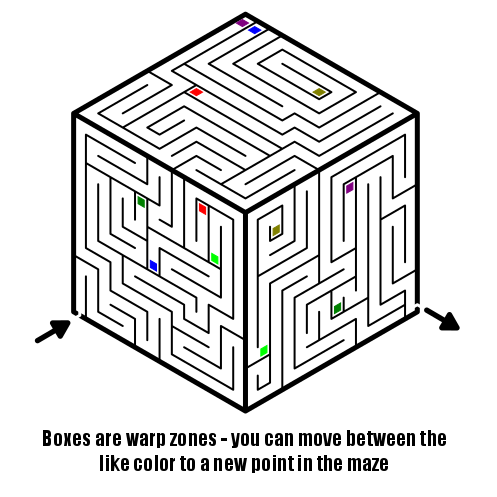
And despite my first few examples using standard maze construction, that is not required. This third example is a mix of an Escape Maze, and a Warp Zone Maze with was made using an axonometric grid. The result is a Hexagon Maze that uses diamond shapes as warps and gives the maze a new look from our other examples.

For my fourth Warp Zone maze example I have this Cube Maze (made with an axonometric grid).
Free Downloadable Warp Zone Booklet
I did an entire month of daily mazes using warp zones and collected them into this booklet, free for you to download.
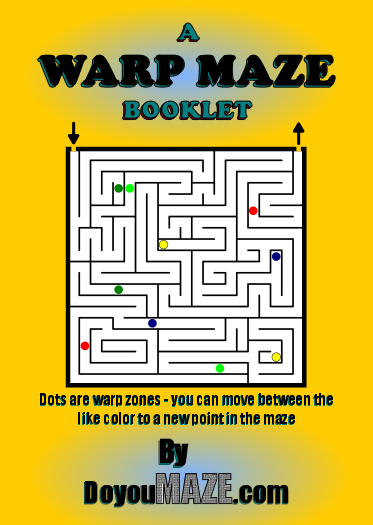
A WARP MAZE BOOKLET
29 pages, 29 warp mazes
File Size: 346 KB
Features each daily maze from February 2020. Warp mazes allow the solver to jump between points in the maze. Each maze gets progressively harder. Separate 4 page answer sheet available if you get stuck.
Interested in learning how to make or draw other types of digital mazes ? I have step by step instructions on how to make over 40 different maze types.
If you prefer making labyrinths, you can find step by step labyrinth making instructions.