Creating a complicated Weaving Maze - an updated method

I have previously written about how to make a weaving maze, then I updated the how to with an improved method that included the addition of a guideline. Today I want to share a specific weaving maze update that focuses on the actual pathway design. I believe this method leads to better maze pathway design and gives the maze maker more control on the difficultly level of the maze. Here are the original posts along with a Pipes Maze how-to which is a themed variation of a weaving maze.

How to Make a Weaving Path Maze

How to Make a Weaving Path Maze - Improved Method

How to Make a Pipes Maze

The example I am using comes from my work on an upcoming book and will most likely become my first book of Pipe Mazes, a follow-up to my Weaving Maze book available on Amazon. Each step will have an illustration. If you prefer, at the end of the post is a gallery where you can see all illustrations back to back and watch the maze be made !

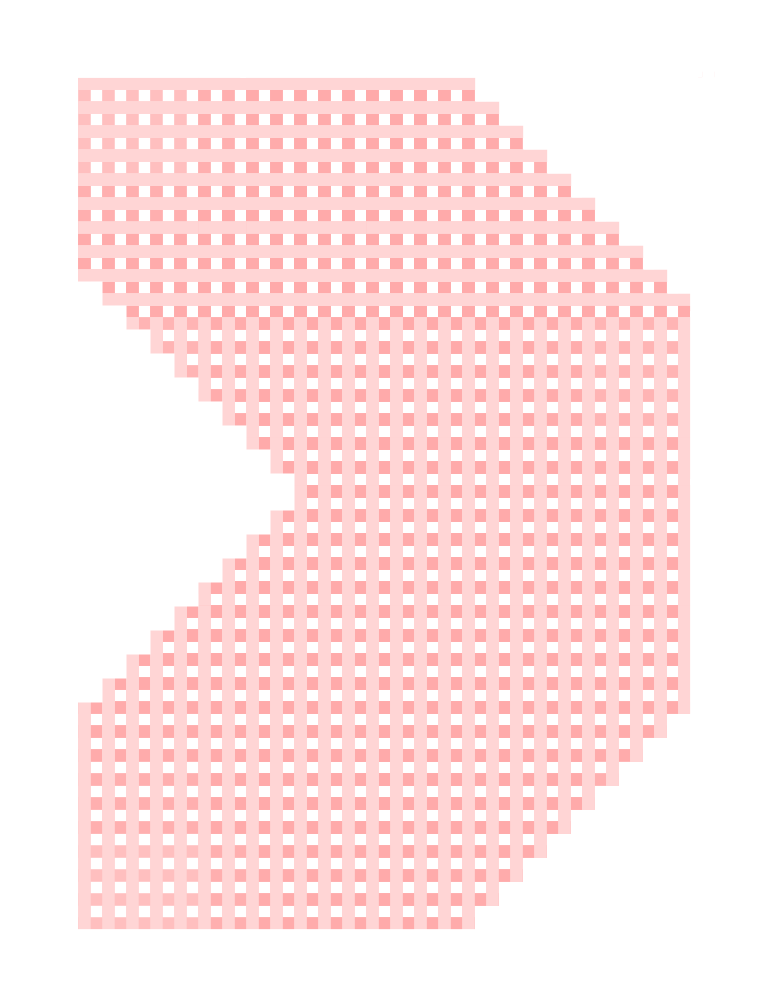
Step 1 - Create a Grid in the Shape You Want to Use

No changes here to the method. I chose a backwards c type shape.

Pipe Maze Grid

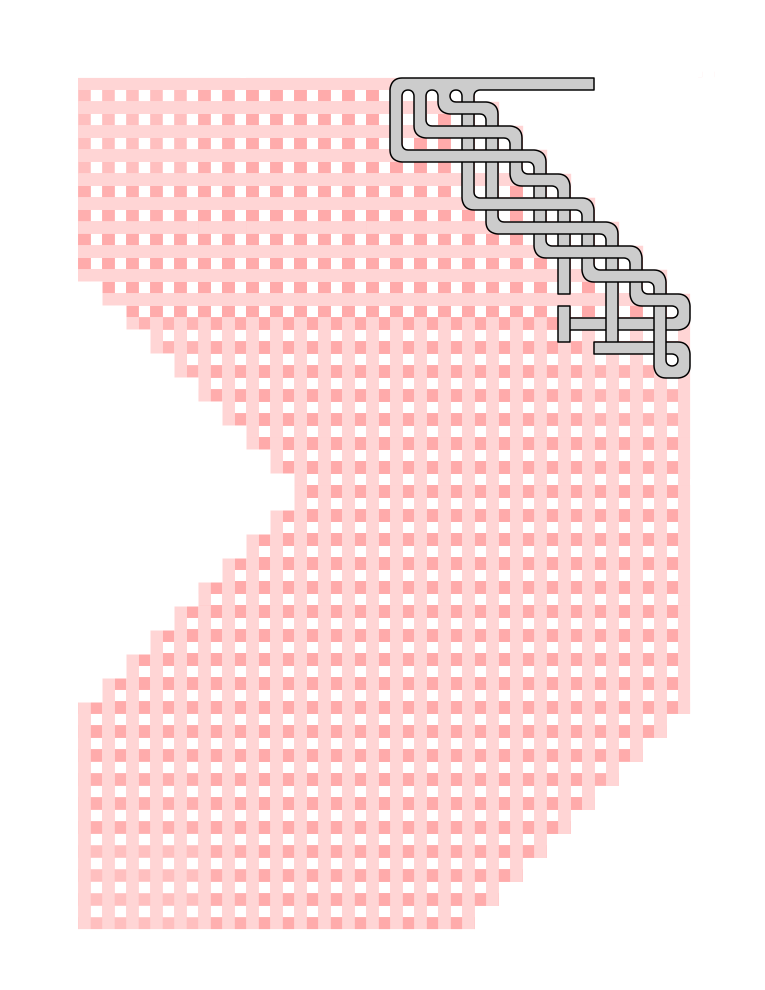
Step 2 - Begin drawing The Maze

My start breaks into 4 different pathways. Pretty normal. As with any maze, the more pathways that are possible the more difficult the maze will be.

Pipe Maze Step 2

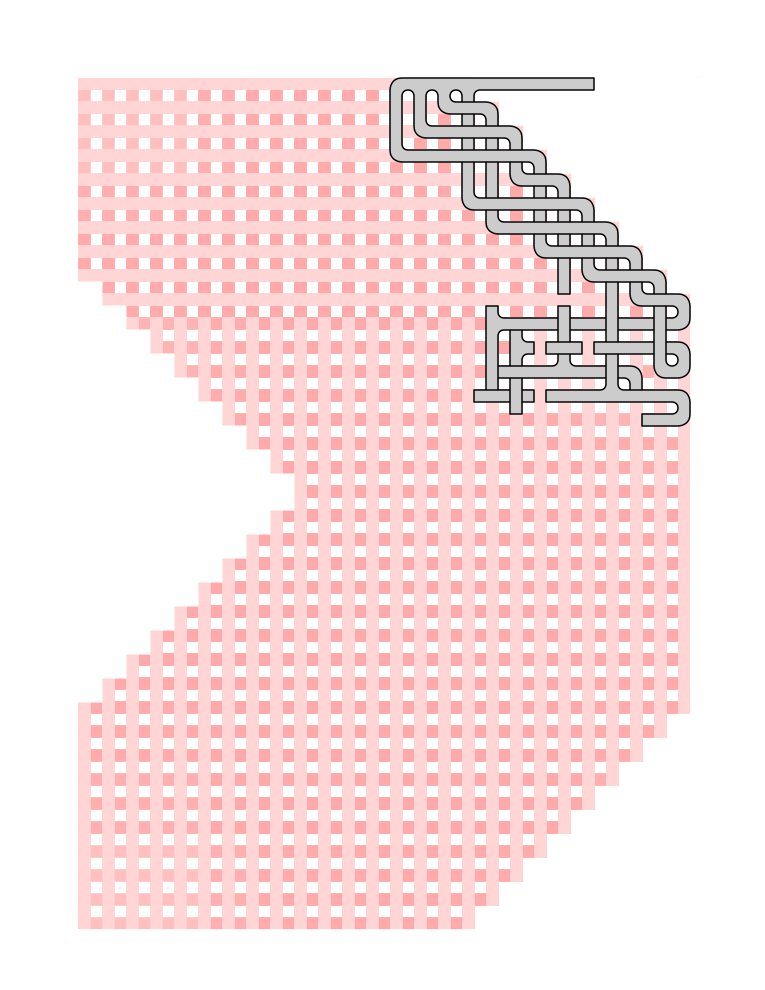
Step 3 - Break off each pathway into multiple sections

In my example I made it simple by breaking 4 pathways into 8 pathways branching each into 2 directions.

Pipe Maze Step 3

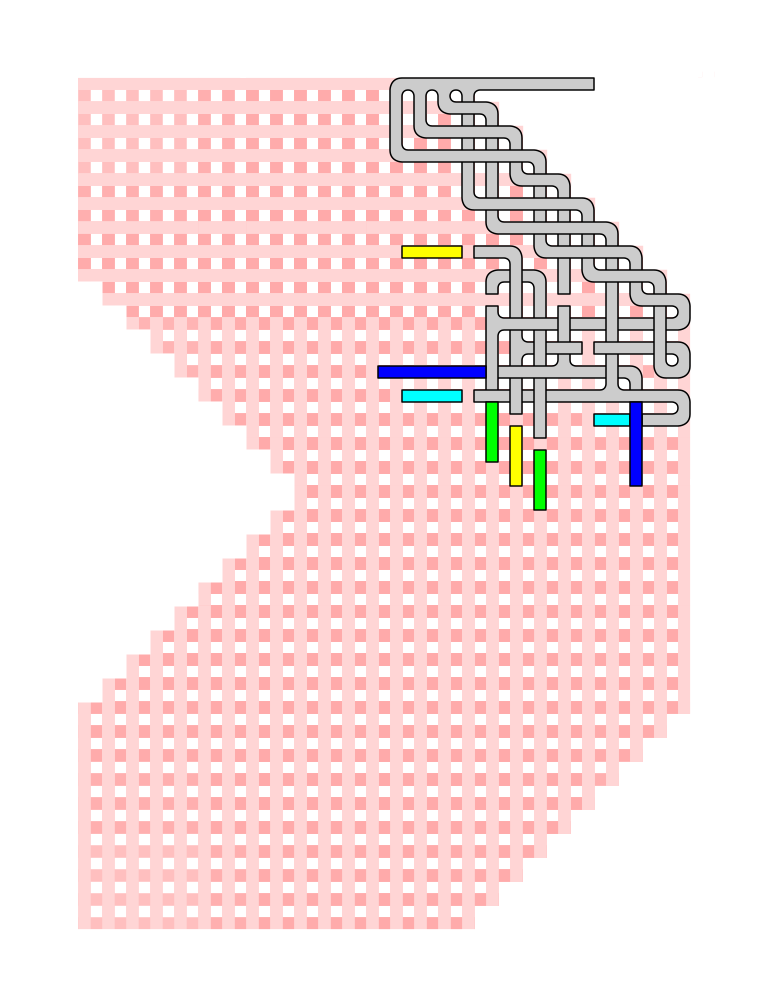
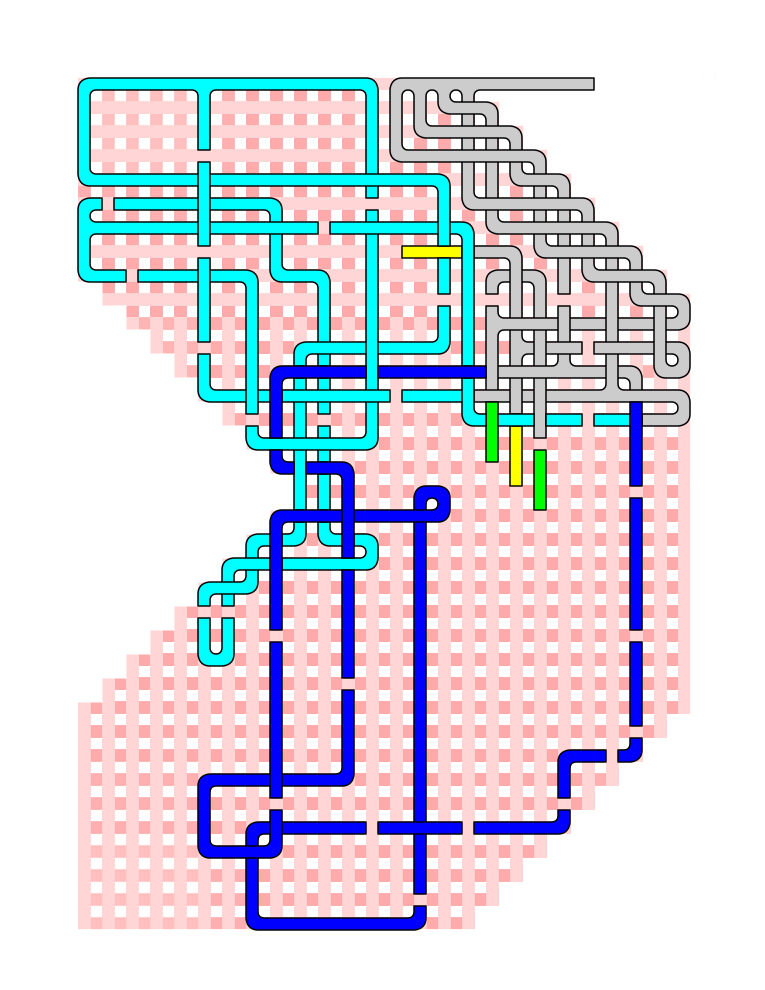
Step 4 - Color Code the Pathways

Here is the real new part of the method. Color code the paired branches so you can keep track of the solution/false pathways more easily. In my example I use 4 colors for the initial pathways as shown below.

Pipe Maze Step 4

The Theory - My weaving mazes do not have dead ends, rather loops that you need to backtrack out of. So, continue to design the maze as you normally would with one exception, when you end a pathway branch, it only ends by connecting with a like color branch. So, if a solver enters the green pathway, they are stuck in that pathway, looping around until they escape to another loop color. Of course one of the loops will contain the correct pathway. For this example 3 of the 4 colors get you stuck. The last color contains the correct pathway (but also some internal loops). Complicate the maze by creating more loops (possible pathways).

Let’s see this play out in this example. The following steps are what I took, but do not need to be followed strictly in any way, they merely break down the thought process I used when designing.

Step 5 - Complete the Blue Pathway

I made the blue pathway a long single loop. A solver will quickly realize that this is a bad direction and move to another option. I consider this an easy version of a bad pathway.

Pipe Maze Step 5

Step 6 - Complete the Aqua Pathway

Again, I decided to design a second bad pathway, but this branch includes some additional loops, so it will take the solver longer to determine they made a bad decision. However, I did this so there were only 4 pathways to take, so medium difficulty.

Pipe Maze Step 6

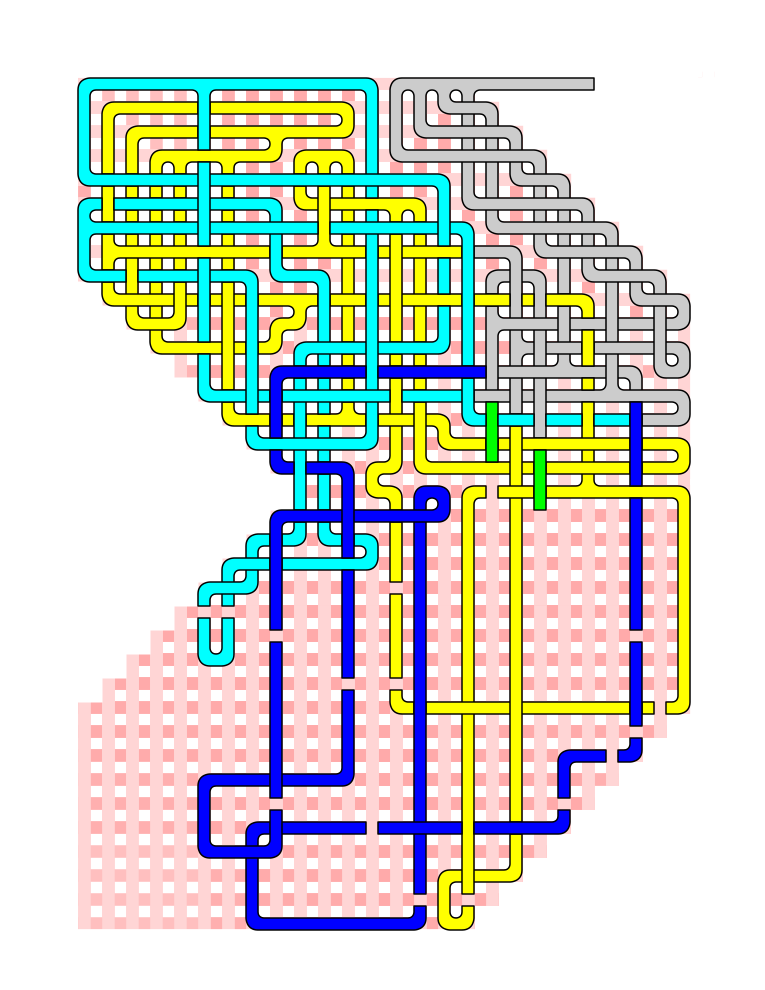
Step 7 - Complete the Yellow Pathway

So here I did the 3rd bad pathway, but made it very complicated. This is the pathway you do not want to take. It breaks into multiple pathways many times, all of which loop around on themselves. This is the difficult pathway.

Pipe Maze Step 7

Theory Break - From a design perspective I made each of the above pathways (each different color) a different difficulty level. Want to create an easier maze ? Use more Step 5 type blue pathways. Prefer a harder maze? Lots of Step 7 version pathways.

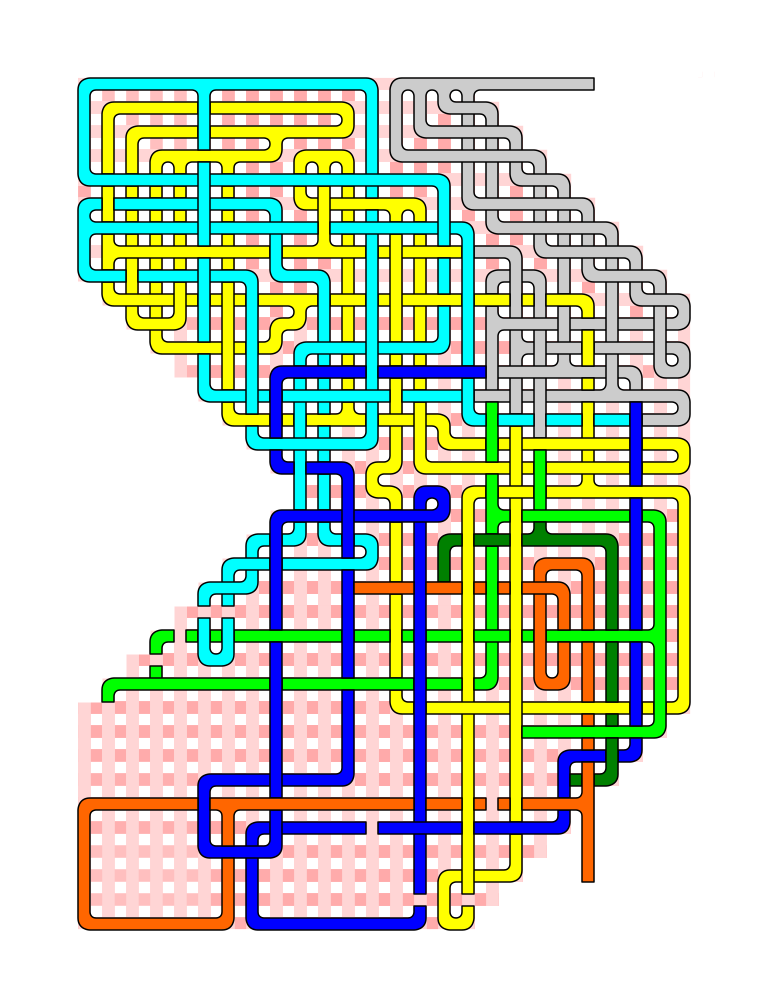
Step 8 - Refine your final color pathway

I now know the green pathways will contain the answer. I actually am not sure which one it will be until I get farther towards the end. So I break the green into 2 shades of green. Eventually one of these will lopp onto itself, while the other contains the solution.

Pipe Maze Step 8

Step 9 - Create the Goal

I used the color orange to designate the goal. I have done this so I can create some wrong pathways for solvers who try to solve the maze by starting at the goal. By creating the goal now, I also can plan the maze pathways better.

Pipe Maze Step 9

Step 10 - Create Goal Loops

For those back solvers. Not necessary, but the more you make the more complicated the maze will become (for back solvers). You are taking up space that could be used in the other direction however.

Pipe Maze Step 10

Step 11 - Continue creating the pathways

Pipe Maze Step 11

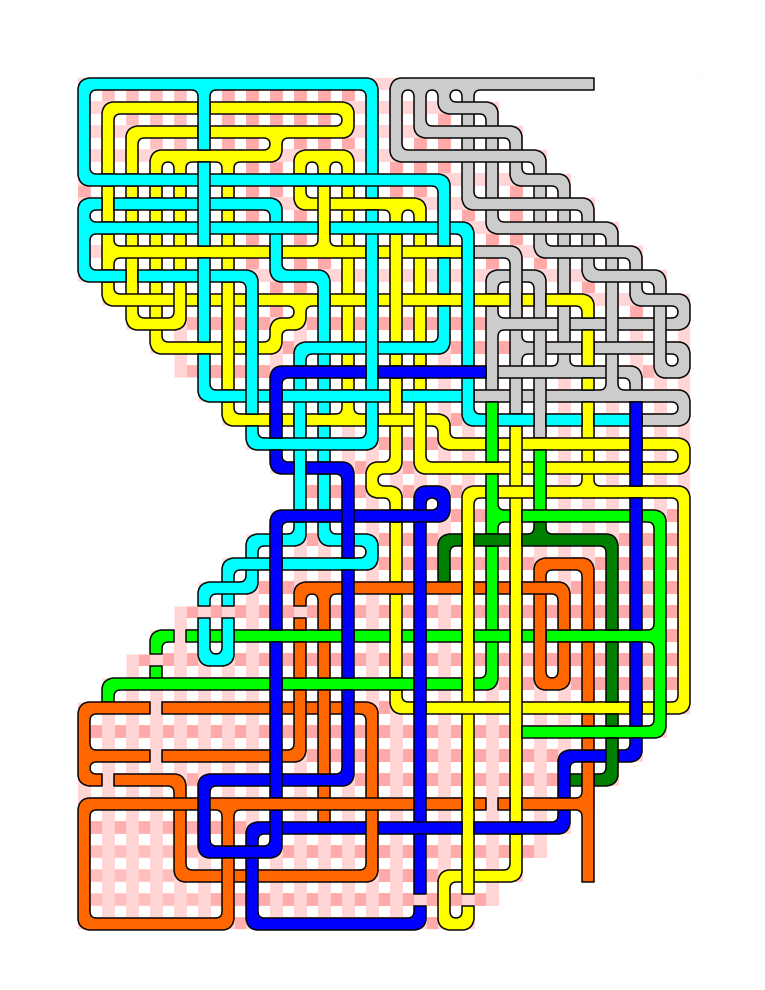
Step 12 - Finish the Maze

Eventually as the maze guide filled in I chose a dark green pathway to link to the orange path.

Pipe Maze Step 12

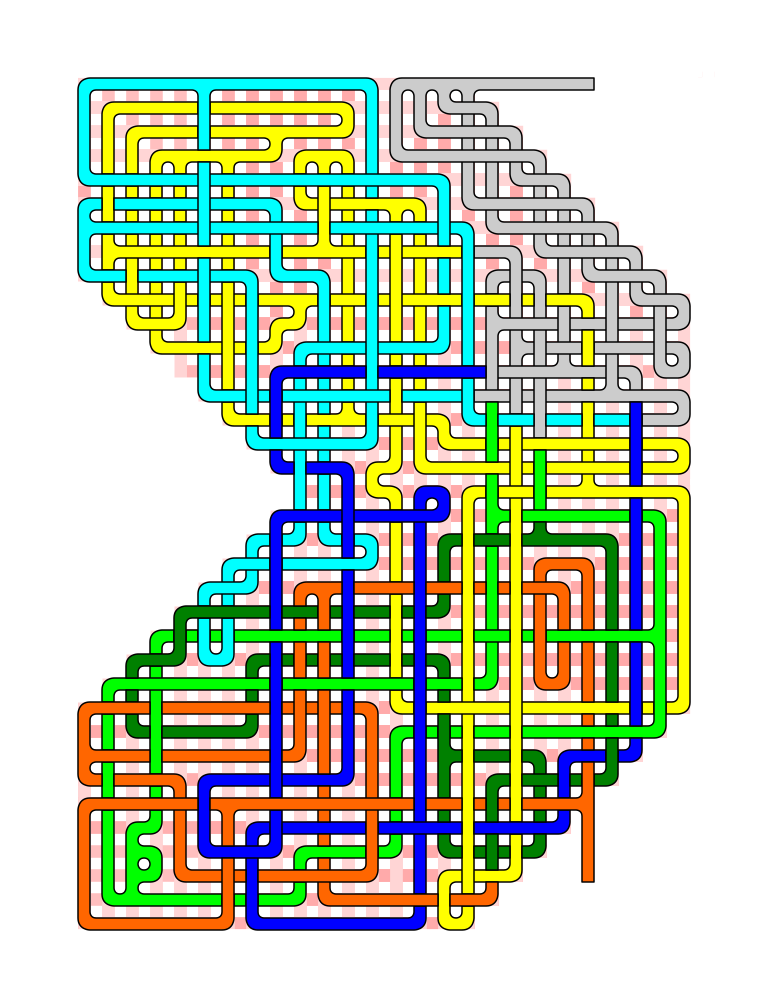
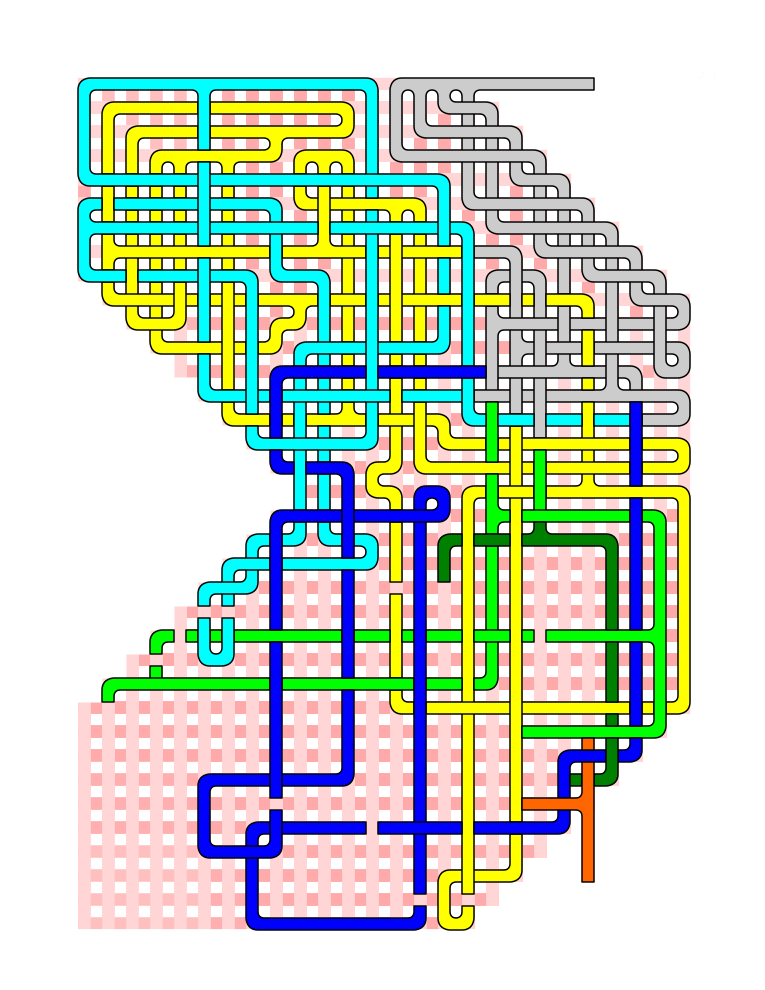
Step 13 - Recolor the pathways

Maze doesn’t look so easy now, does it ?

Pipe Maze Step 13

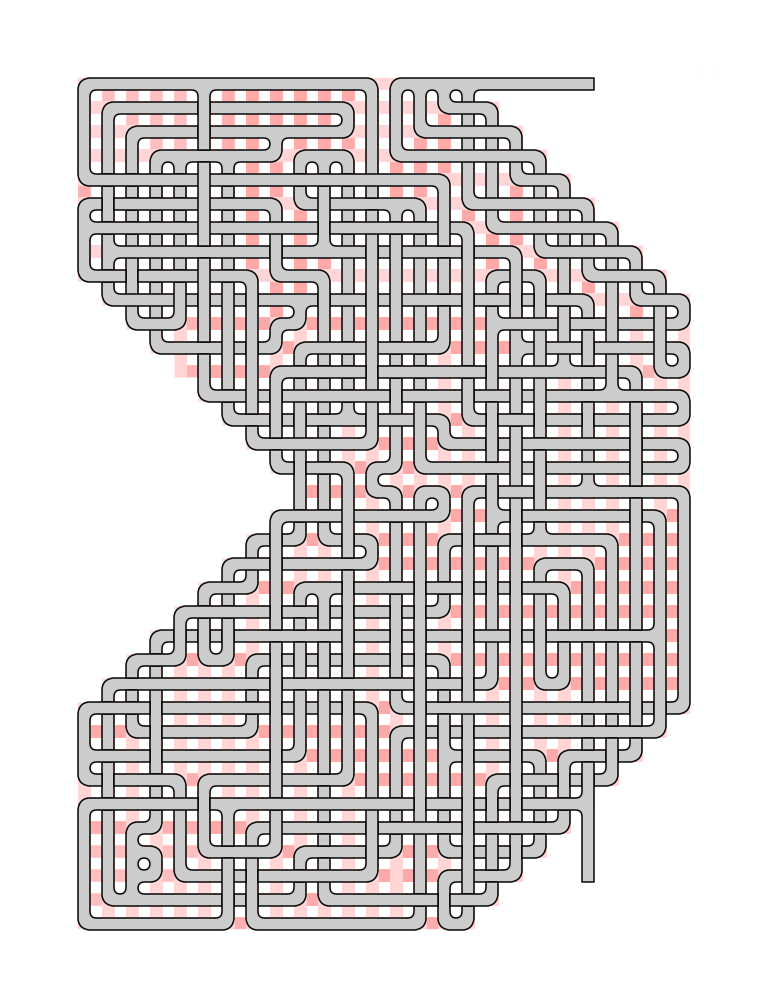
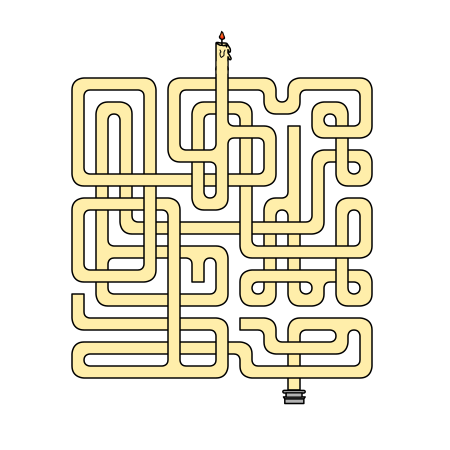
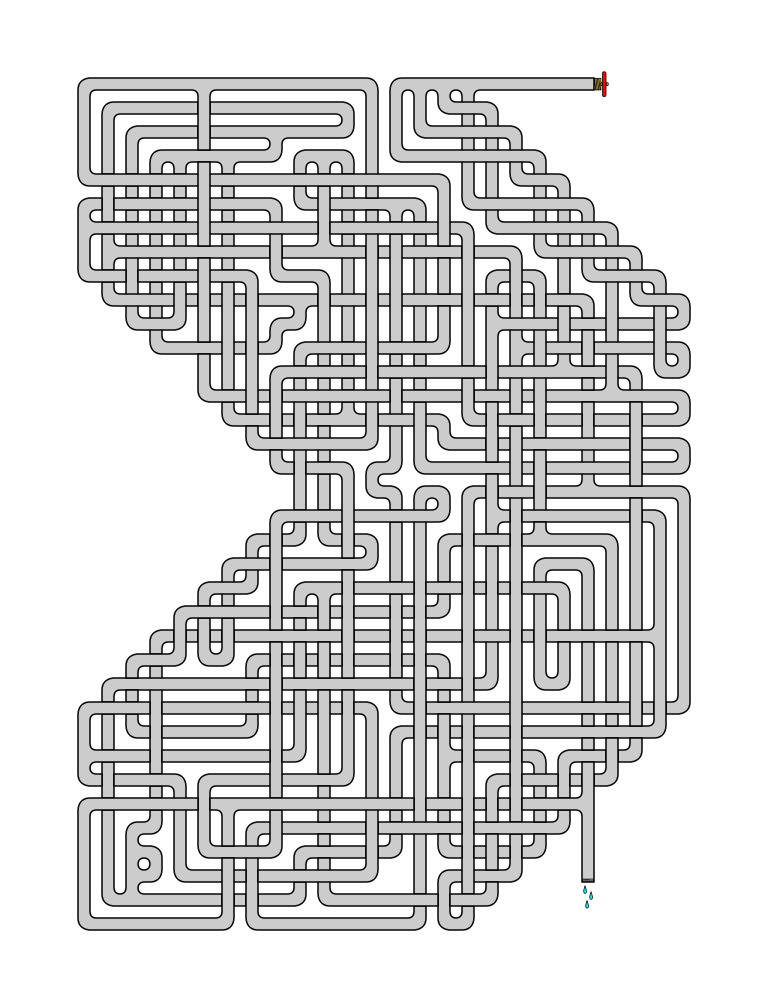
Step 14 - Make the Final Touches

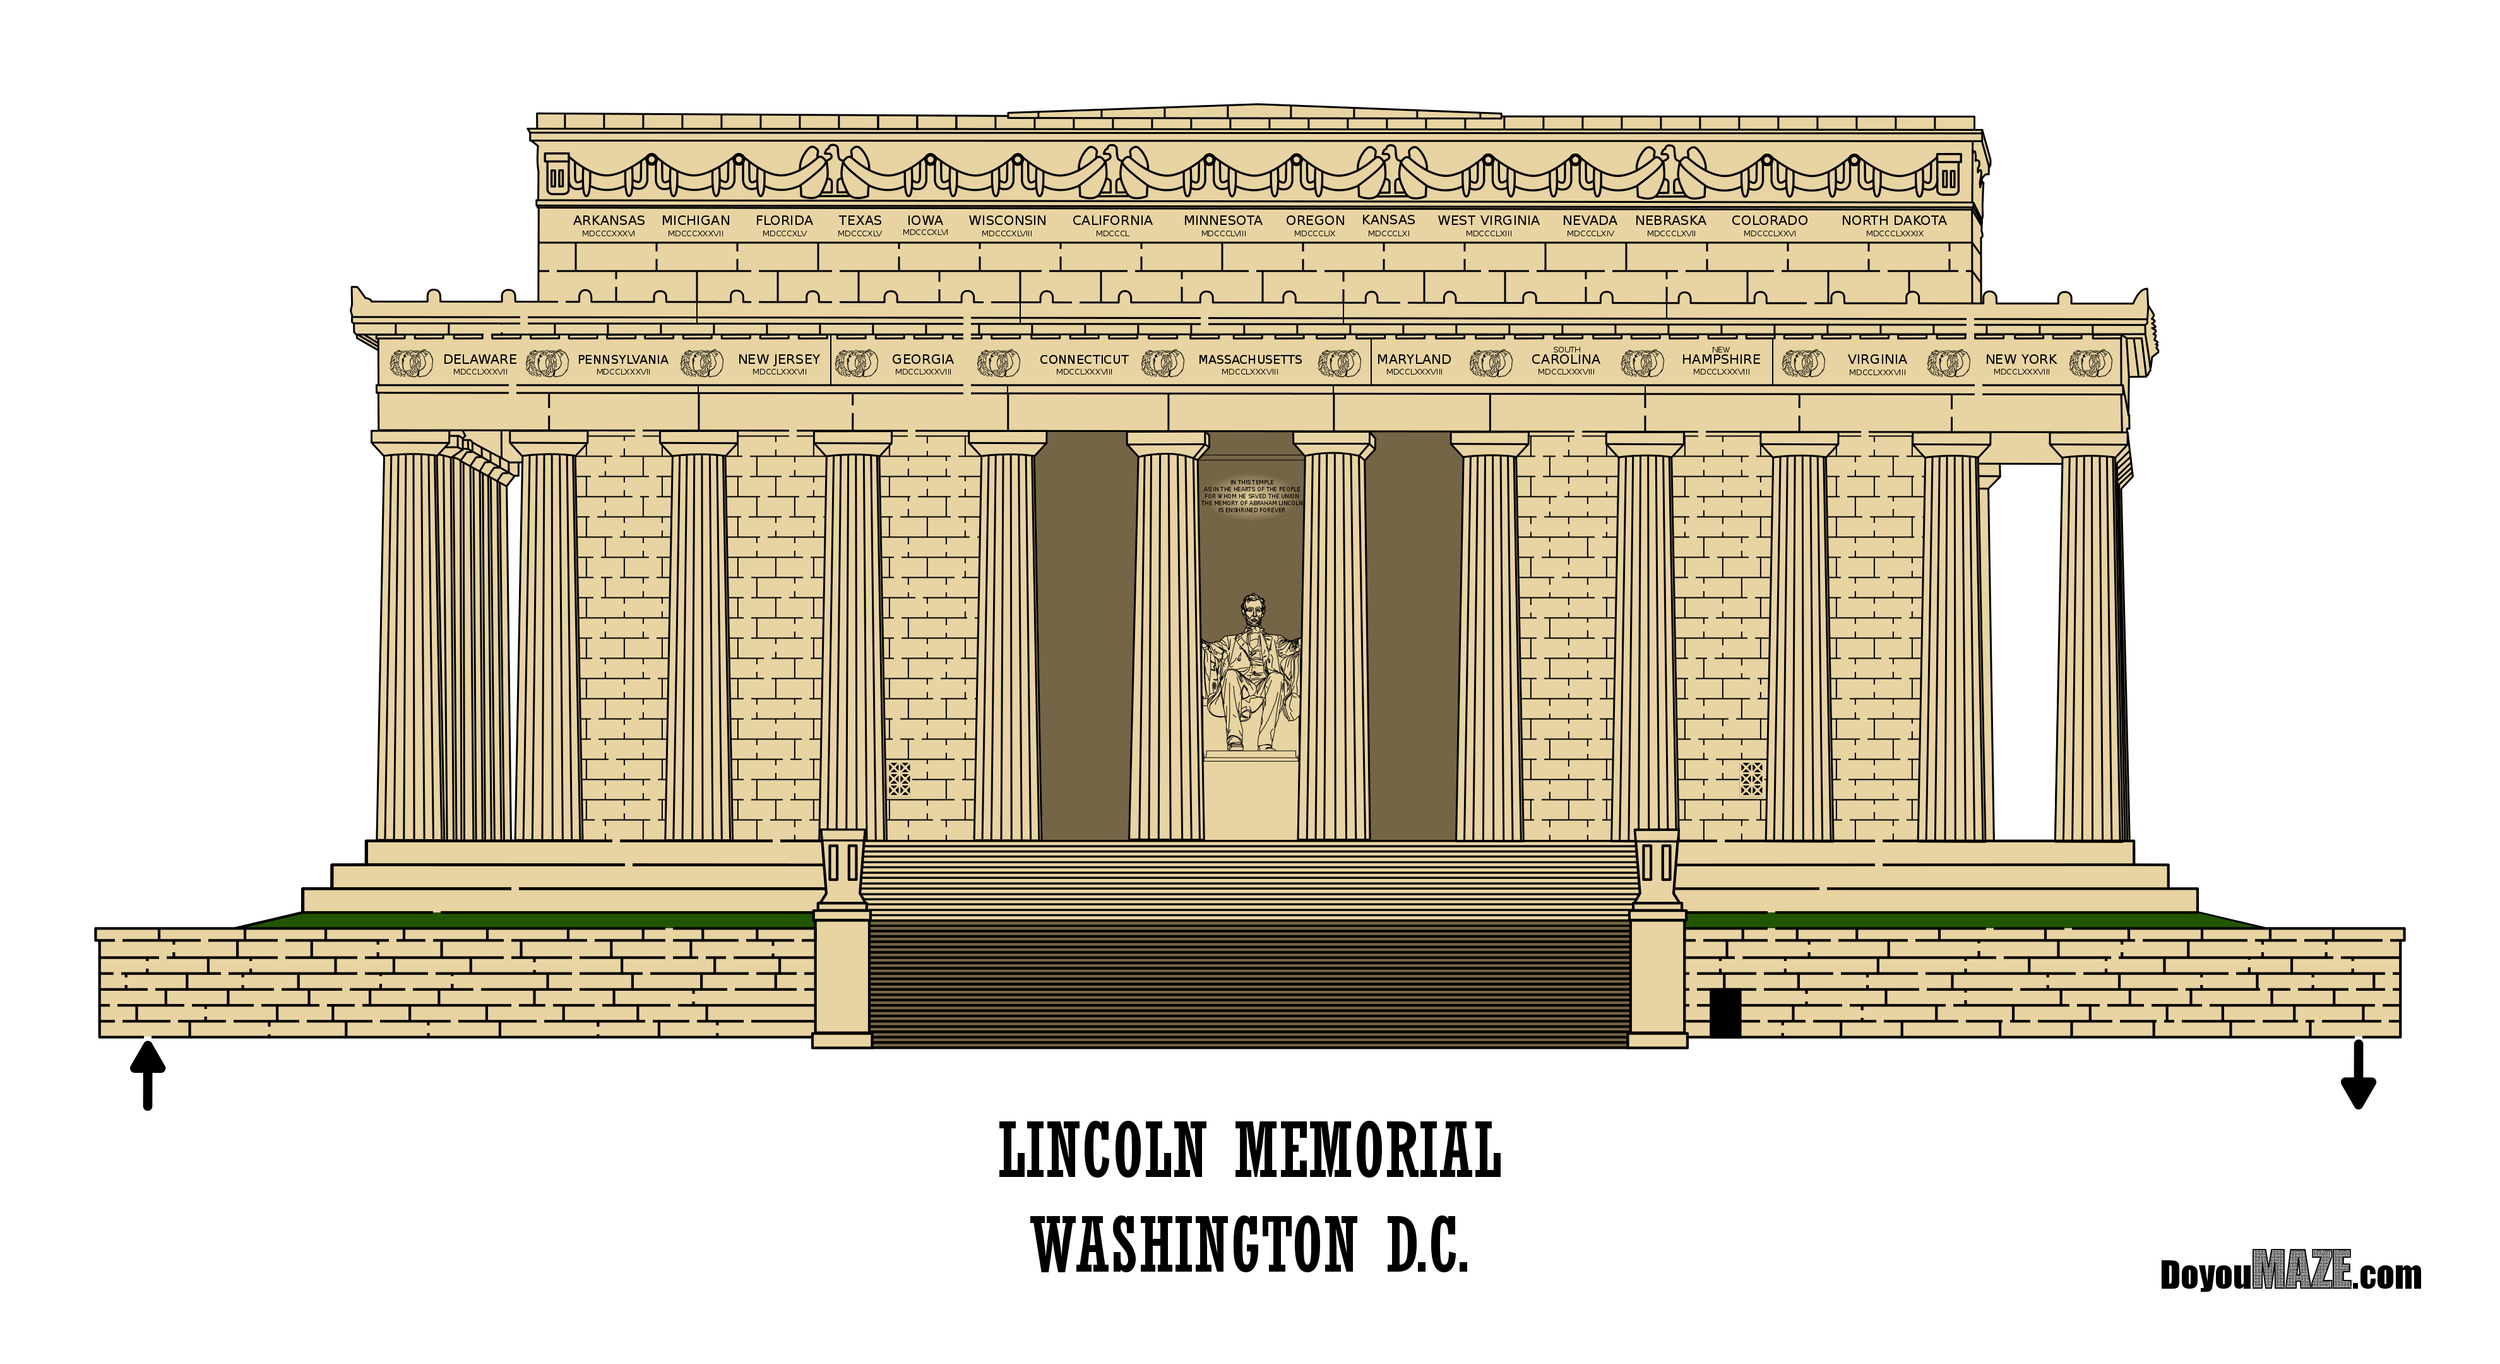
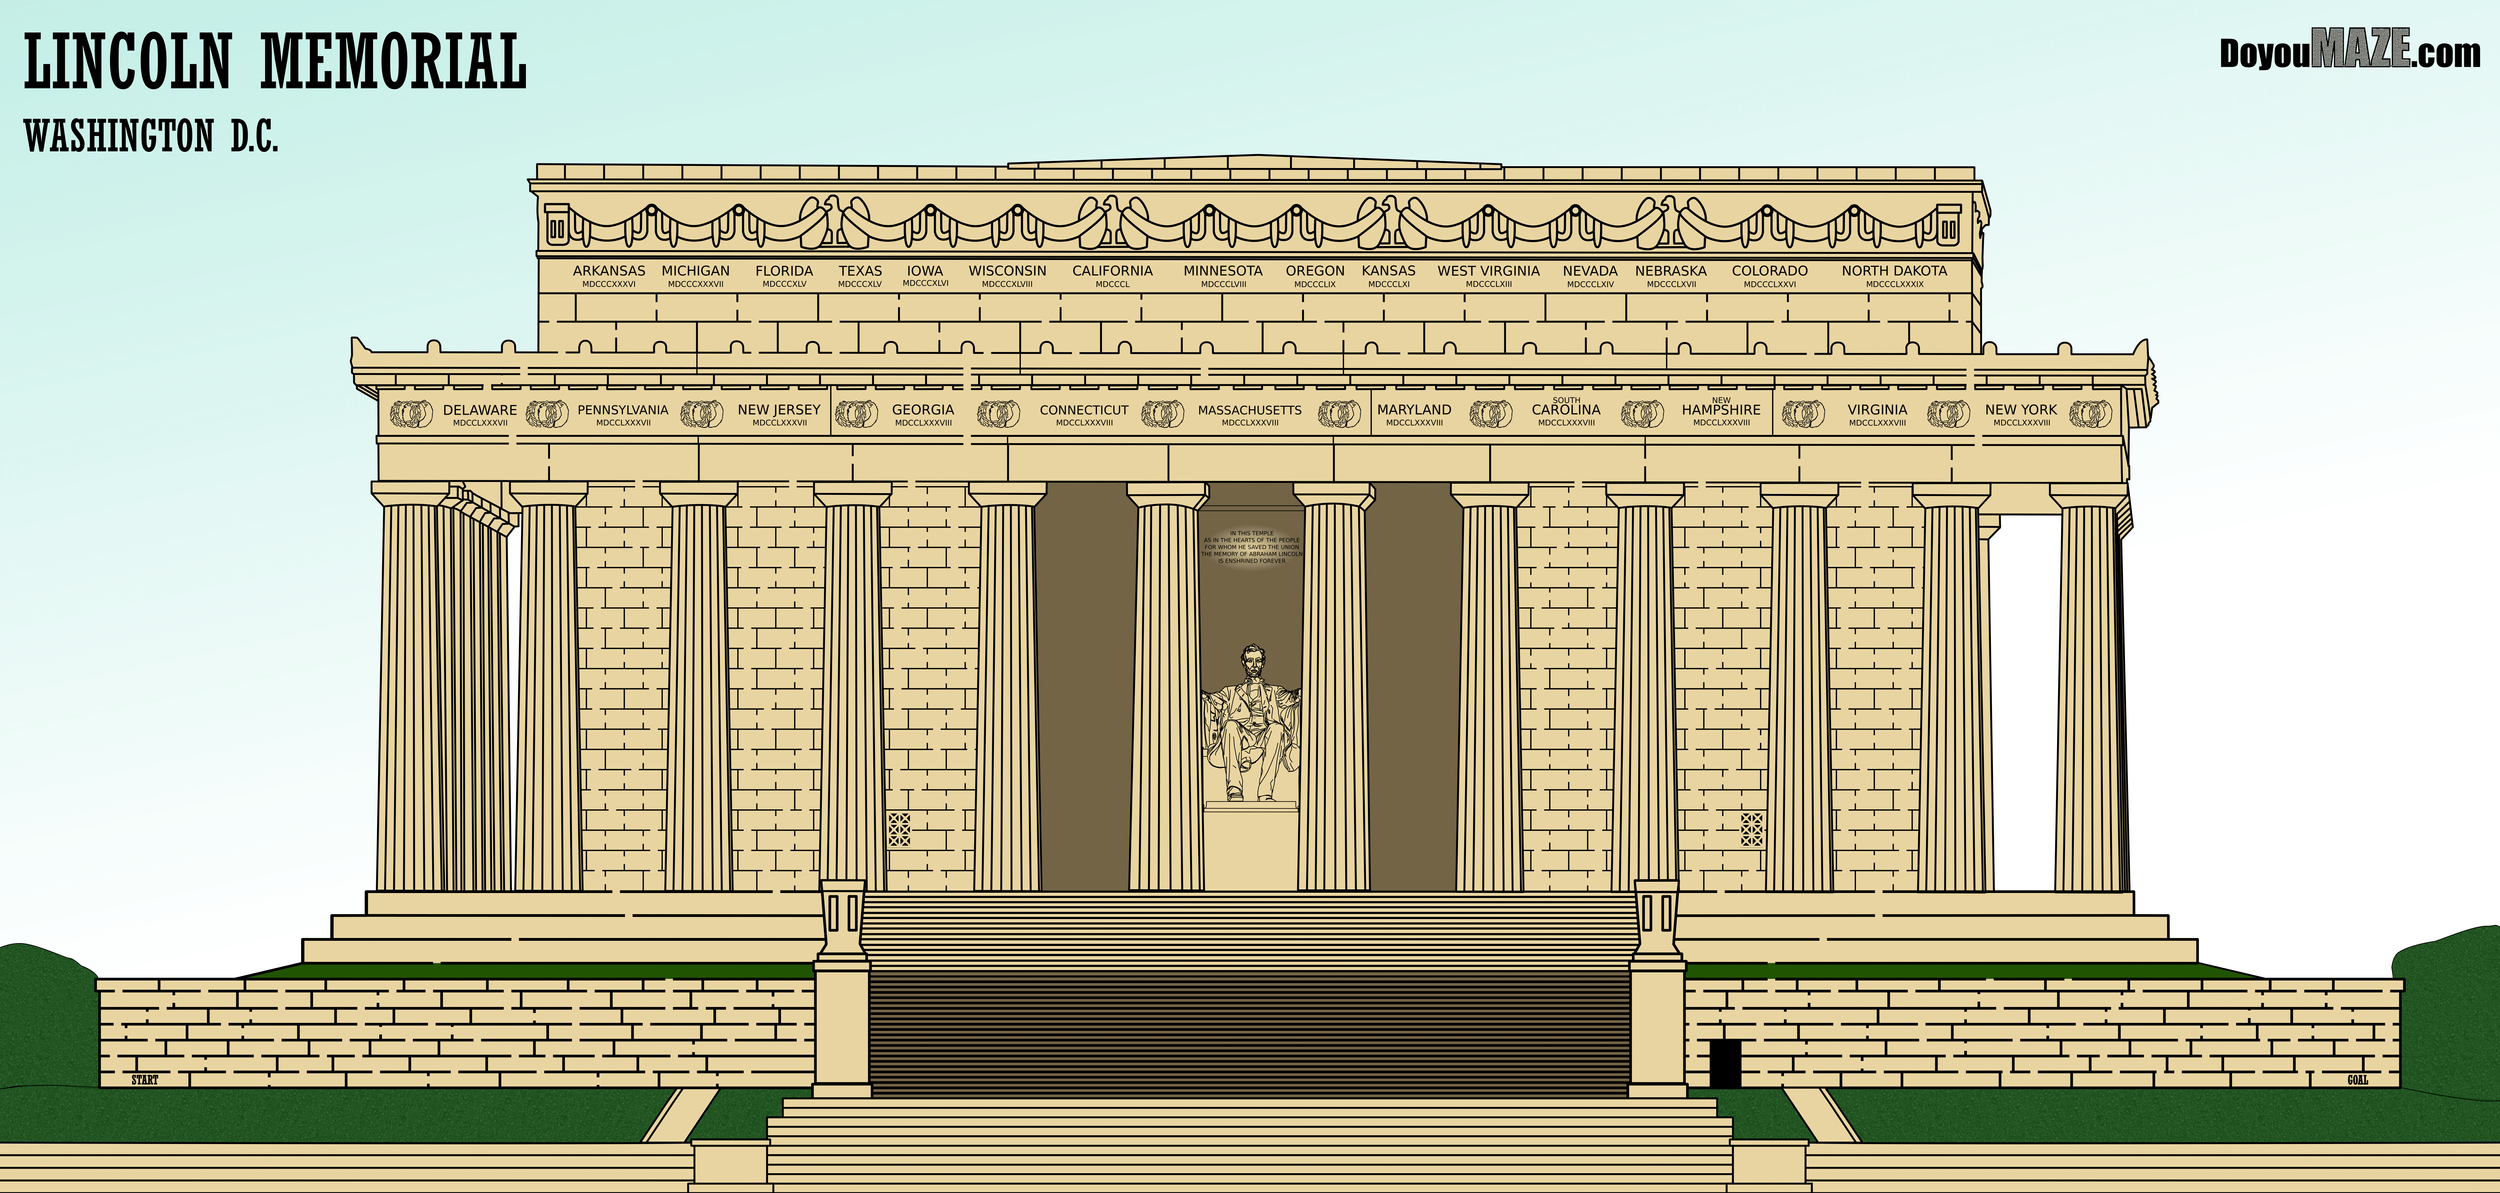
Since I made this a Pipe Maze I add the details of the start and goal and also delete the guideline to create the final maze ! This is a good time to test the maze if you want also.

Create a pipe maze Step 14

Summary:

Use colored pathways for your weaving pathways to control the difficulty of your mazes. Create false pathways emanating from the goal to further complicate your maze.

Full Build Gallery: click to watch the maze build

Maze Comic Book Cover #59 - STRIPES

Issue #59 in my comic book cover series is called STRIPES and features a new maze of a Lemur. The lemur looks a bit mean (are lemurs mean?).

My comic book cover mazes can be found in 2 places:

Comic Book Cover Mazes - Year 1 (Issues #1-53)

Comic Book Cover Mazes - Year 2

To receive a book of my first year of comic book book mazes (Volume 1 with mazes #1-53) you can sign up for my book alerts - any time I launch a free maze book, or paid book (on Amazon), I will send you a note about the new book launch.

Maze of the Week 27 Redux - Lincoln Memorial (MOTW #163)

The Lincoln Memorial is a recognizable landmark for Americans and it has made it a popular maze on the website. I wondered how much I could improve it by applying some new techniques I have learned. Let’s see how I did. Here is my original post for the maze:

Maze of the Week #27 Lincoln Memorial Maze

Here are the enhancements I made to improve the maze:

1. New Start/Goal. Removed the arrows and replaced them with written out Start and Goal.

2. New Page Size. Reduced the height of the page from 34 inches to 21 inches.

3. Added a Sky. Light blue. With changes #6/7 below this took the maze from floating on a white page to anchored into the page.

4. Title Changes. Reduced the font size of the city. Moved the branding and titles from the bottom to the top corners.

5. Added Shrubbery and Lawn. With texture on sides of the Memorial and in front of the wall.

6. Reoriented the Maze. I moved the maze to the bottom of the page and…

7. Added more Foreground. I added more steps and walls in the foreground to fill the space on the bottom of the page (with no maze changes).

Let’s see the before and after:

Nothing major, but an improvement. I considered adding shadows and still might in the future, but understand that it is a huge undertaking for this building ! So many nooks and crannies and shapes to consider !

Some data: The new file is 4490MB from 614MB.

I will be adding the new version of the maze as an option going forward. You can find the maze download in my past maze collection section of the site.

If you like this type of content check out all of my case studies:

A Collection of Maze Design Case Studies to Improve your Mazes

What I've Learned Making Mazes

Happy maze-ing !

What is Your Preferred Weaving Maze Style ?

I like making Weaving Mazes. It is a type of maze where the more you make it, the more you learn how to improve it. This is the only maze type where I had to make a “how to” update to show how to make the maze type. I also did a separate how-to for the pipe maze version of weaving mazes:

How to Make a Weaving Path Maze

How to Make a Weaving Path Maze - Improved Method

How to Make a Pipes Maze

But it is an interesting maze type because you have so many options. Let’s go through some of those options today. I will be using one maze and making with many different different options.

Option 1 - Standard Weaving Maze

Nothing special. This version is just a weaving maze.

Standard Weaving Maze

Option 2 - Standard Weaving Maze - with background shadows

Same as above but I added a background shadow to make the maze easier to see on the white background.

Standard Weaving Maze - with background shadows

Option 3 - Standard Weaving Maze - with maze shadows

I did this quickly, but I added shadows to the “under” weave pathways of the maze. This gives the maze more interest and makes it easier to see where the pathways travel.

Standard Weaving Maze - with maze shadows

Option 4 - Standard Weaving Maze - with internal arrows

The other way to help the solver along is to use arrows internally. You can also use these to make some pathways one way (I did not do that here), and add complexity to the maze !

Standard Weaving Maze - with internal arrows

Option 5 - Pipe Weaving Maze

I like the pipe style of weaving mazes. It means the dead ends get caps, the start and goal become a spigot and water. The corners all become more rounded to look like pipes.

Pipe Weaving Maze

Option 6 - Pipe Weaving Maze - with background shadows

Again, just makes it easier to see the maze.

Pipe Weaving Maze - with background shadows

Option 7 - Pipe Weaving Maze - with internal shadows

Same as Option 3 above but doneas a pipe maze.

Pipe Weaving Maze - with internal shadows

Option 8 - Weaving Maze - Point to Point version

So this version of the maze uses circles at each change of direction with pathways between them. The pathways weave. Normally this maze would be more spread-out so I used a grey background to make it easier to see, and a shadow.

Weaving Maze - Point to Point version

Options 9/10 - Weaving Maze - Unique item options

What things are also long and fit into this maze construction ? I tried 2, a candle in a candle holder and a broom. There are dozens of possibilities, much like the kids mazes that are “help the xxxx find the yyyy” where xxxx is an animal and yyyy is what that animal eats.

So those are 10 versions of the same maze with some different decisions made. Which do you prefer ?

This type of maze does have some unique issues when you make it - it is easy to make mistakes ! So much so that I made 2 blog posts about my many mistakes if you want to test your observation skills !

Can You Find the Maze Design Mistake ?

Can You Find the Maze Design Mistake ? Part 2

I sell a book of 100 Weaving Mazes on Amazon if they seem interesting to you. Buy it on Amazon

Other posts you may like:

What I've Learned Making Mazes