How to Make a Laser Maze

In a series of posts I will show you how to make a maze in a wide variety of design constructions. The 44th type of maze construction is the Laser maze. Let’s define what I mean, then get into the example. This particular maze type was brought to my attention on the reddit maze page by user naveedurrehman. It is a puzzle type drawn maze and unique in that the pathways are invisible initially and created by the maze solver !

LASER Maze - A type of PUZZLE maze where THE SOLVER USES PHYSICS TO DETERMINE WHERE A LASER beam WILL BOUNCE in order TO SOLVE THE MAZE.

I want to mention there is a physical version of this maze type, and it may make you think of the movie Entrapment starring Sean Connery and Catherine Zeta-Jones. Also, Mr. Beast featured one on his channel.

And there is also a physical kids game version of this maze made by Thinkfun where you use mirrors to solve challenges. The game was the winner of the Good Housekeeping Best Toys Award !

How to Make a LASER Maze (DRAWN)

Step 1 - Draw the Outline and Possible Goals

The outline of a laser maze includes 3 sides with an opening for the initial laser to move through. It is possible to do multiple shapes but the most basic is 3 sided for this example. Goals, or possible goals line the outside of the walls. I suggest nothing less than a 4x4 grid, meaning 8-12 possible goals around the border. I like using pink blocks to highlight and guide where mirrors can be placed during maze creation.

Make a laser maze step 1

Step 2 - Draw the Initial Laser and Mirror

Draw a laser, at the top reflecting off the first mirror/wall. This is essentially your “START”.

Make a laser maze step 2

Step 3 - Draw the Solution

Add mirrors (walls) that the laser will bounce off of to make the maze solution. In my example below, I fill most of the maze.

Make a laser maze step 3

Step 4 - Add the Unused Mirrors (walls)

If the solver followed the physics of the laser and bounced in the correct directions, any walls you add will never be used. Be mindful to not block any used pathways that would re-direct the solution. I also deleted my pink block guides.

Make a laser maze step 4

Step 5 - Add the Directions

This is a type of maze that needs instructions to solve. Add them to the maze. I used simple directions.

Step 6 - Create the Solution (OPTIONAL)

Make the solution to the maze.

Additional Laser Maze Examples

Each laser does not need to bounce 1 level or block, it can move across larger distances. There is no need to fill each block with a mirror, gaps are interesting ! Here is a 5x5 version that includes gaps:

Kids 5x5 Laser Maze

For my next example, I lined 3 sides with possible goals, so 15 total possible goals instead of just 10 using the 2 sides.

Additional Design Discussion:

Do they need to be square/rectangular ? No. But the use of right angles makes solving easiest. There is no question which direction the bounce is going to go to. A triangle, hexagon, and other geometric shapes would also work, with some complications to work through.

How big can they be ? As large as you can imagine.

Only right angles ? You can use other angles, but they complicate the design for both the creator and solver.

Ready to make your own laser maze ? Good Luck !

I did a 3 part blog series on maze constructions if you want to design your own type of maze. Part 3 includes all of the conditional maze options.

Part 1 - Starting and Ending a Maze - Speaks to the 9 most popular ways to start and stop a maze

Part 2 - Maze Path options - Explores the 12 different pathway options for a maze

Part 3 - Conditional Path options - Speaks to 11 different conditional options to add to a maze to make it more enjoyable

Interested in learning how to make or draw other types of digital mazes ? I have step by step instructions on how to make over 40 different maze types.

If you prefer making labyrinths, you can find step by step labyrinth making instructions.

Maze Comic Book Cover #65 - Fowl Play

Issue #65 in my comic book cover series is called Fowl Play and features the maze of a Shoebill bird. The background of the comic was made using starryai.

My comic book cover mazes can be found in 2 places:

Comic Book Cover Mazes - Year 1 (Issues #1-53)

Comic Book Cover Mazes - Year 2

Shoebill Maze Comic Book

To receive a book of my first year of comic book book mazes (Volume 1 with mazes #1-53) you can sign up for my book alerts - any time I launch a free maze book, or paid book (on Amazon), I will send you a note about the new book launch.

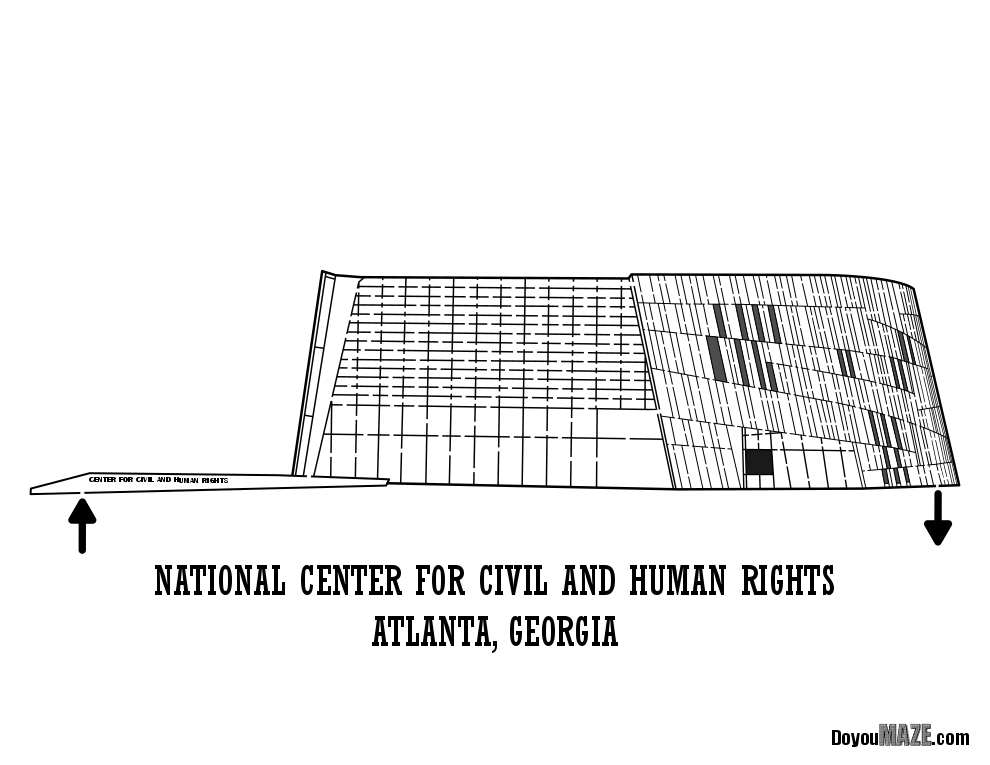
MOTW# 25 Redux - National Center for Human and Civil Rights (MOTW#169)

This is my second archived maze that is being re-done. The first was the Museum of the North in Alaska. What is in the archive ? Basically, mazes that few people care about. But I care about this maze, and so I improved it. Here is the original post:

Maze of the Week #25 - National Center for Civil and Human Rights Building Maze

So this is the 3rd time I touched this maze. It was originally only in black and white, then I took the time to colorize it.

Here are the enhancements I made to improve the maze:

1. Changed the Size. Changed the height from 7 to 5.3 inches, which I used to reduce the lawn size ! Then I changed the width from 14 to 13.2 inches and reduced the empty space on the left of the building.

2. New Title Size. I used a new smaller font on title

3. Branding Changed. I reduced the branding size by 15%. On the smaller size the brand was too large.

4. Arrows Changed. I reduced the size of the start and goal arrows by 35% so they weren’t so overpowering.

5. Minor Pathway Changes. I made it so there are slightly wider entrance and exit pathways to the maze.

6. Nook Changed. I used a new shadow technique used on front of the building nook that changes the color to be more accurate (from greenish to a dark yellow).

7. Lawn Changes. I added texture to the lawn. I thickened the reeds on the right side at the exit. I added a new hill on left in the horizon.

8. Windows Changed. I changed front window tiles from black to dark charcoal to be more accurate. You won’t notice.

9. Added the Sky.

Here is the before before and the before and after:

Better ? Yes. A lot better ? Maybe. The change from black and white to the new version is more drastic than the intermediate step.

Some data: The new file is 616MB from 58MB.

I will be replacing the archive with the new maze going forward. You can find the maze download there !

If you like this type of content check out all of my case studies:

A Collection of Maze Design Case Studies to Improve your Mazes

Happy maze-ing !

Discover the World’s Largest Snow Maze

I previously brought you a post about 5 of the World's Largest Winter Mazes which featured a variety of unique, large mazes like the World’s Largest Ice Maze, the World’s Largest Christmas Light Maze and the World’s Largest Maze made of Christmas Tree’s. Well I want to add another Winter Maze to the list, the World’s Largest Snow Maze !

Located in St. Adolphe, Manitoba, (about 10 minutes south of Winnipeg) this all ages Snow Maze makes for a unique family adventure. Measuring in at just under 2800 square meters, the maze takes about 30 minutes to navigate. The walls are 6.5 feet tall and 2 feet thick and some of them feature some very nice carvings (see video below). The maze website showcases some wonderful photos of the snow maze. The site is seasonal (currently closed), and has 7 different things to do throughout the year, including a Corn maze (August-October), Petting Zoo (August-October), Pumpkin Barn (October), Haunted Forest (October), Sunflower Expo (August-September), and the Den Restaurant. During snow maze season they also have toboggans & snow tubes available.

I suggest you read the maze policies on the website before visiting, but a general summary is to dress for Winter weather and bring a sleigh for the kids.


This video gives great overview of the location and features the carvings I mentioned above.