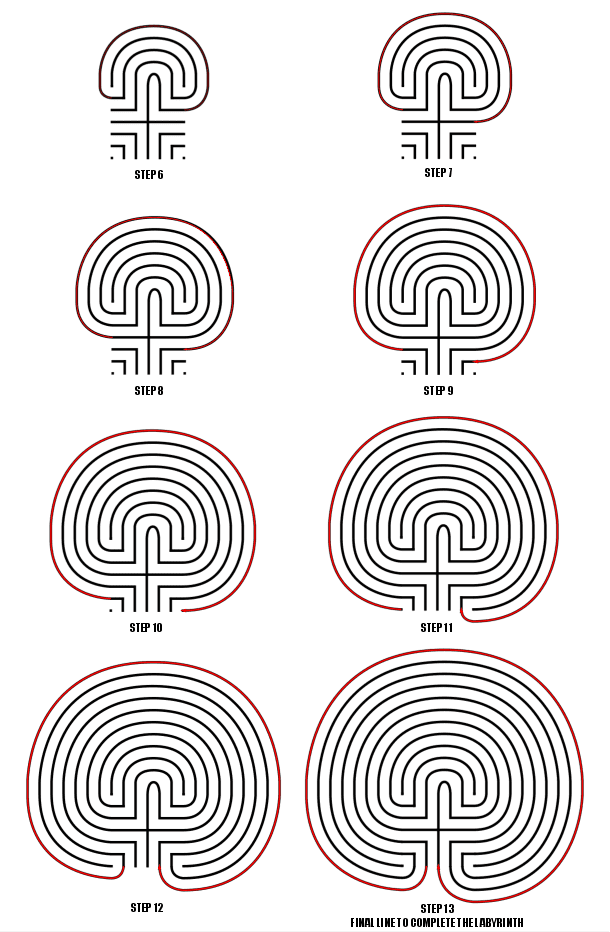
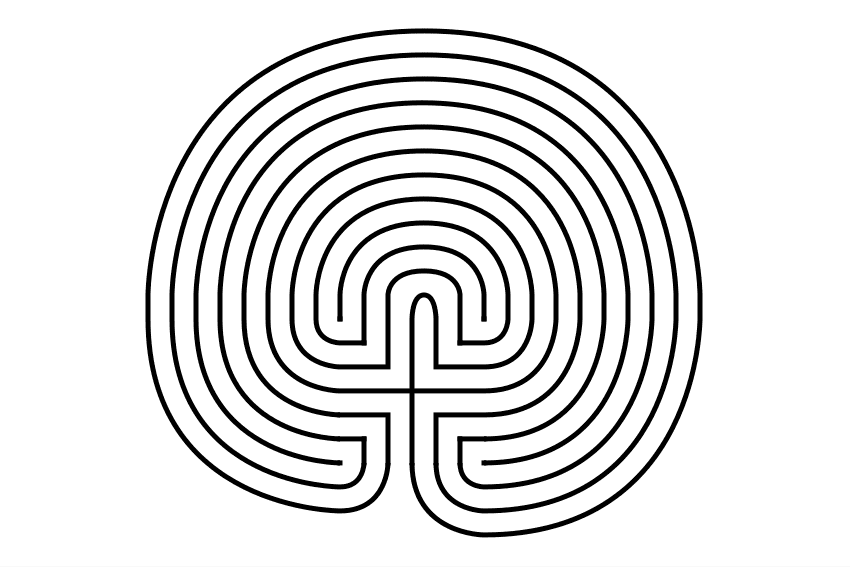
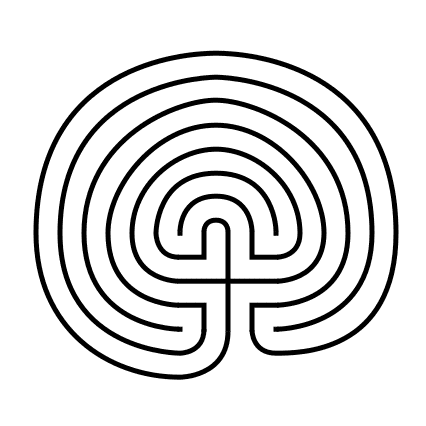
Drawing a massive 27 circuit classical labyrinth feels like running a marathon. I have never run a marathon. That might be a lie. To Draw it step by step it takes a 29 step process. Writing that out and going step by step is laborious, so instead I am going to give you the cheat codes. It saves me time. If you decide to create this it probably won’t save you any. The truth hurts. Let’s get on with it.
Step 1: Draw the starting seed pattern
The starting seed pattern based on an imaginary 14 x 14 box grid. Start with a centered is a plus sign. Add L shapes one grid away from the plus sign in all 4 quadrants. Repeat until you have 6 L per quadrant. Finally add a dot to each of the four corners. Basically, copy the seed the pattern you see here:
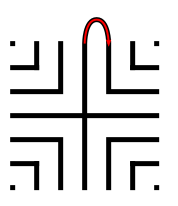
Step 2: Connect the first arch to create the goal
Draw a curved line from the top of the plus sign to the L directly to the right using an arch that extends 1 grid high. The top of the arch should peak halfway between those two points. This line will form what will become the goal of the labyrinth.

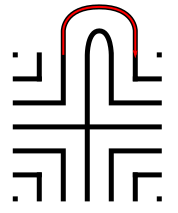
Steps 3 - 29: Connect the next endpoint to the left to the next endpoint on the right
Every step from now on will be basically the same. Move one point to your left (moving counterclockwise) and connect that to the next point on the right (moving clockwise).On the right find the listing of connection points. We already connected points 1 to 1. TIP: the top of all the arches will all align above the same point.

If you get into any trouble refer to the directions for the Classical 7 Circuit Labyrinth. This is essentially the same, but many more steps. That completes the drawing of an 27 circuit labyrinth.

Interested in learning how to make or draw other types of digital mazes ? I have step by step instructions on how to make over 40 different maze types.
If you prefer making labyrinths, you can find step by step labyrinth making instructions.