In a series of posts I will show you how to make a maze in a wide variety of design constructions. The 34th type of maze construction is the Conditional Path maze. Let’s define what I mean, then get into the example. Every example will use the sample basic outline (the state of Ohio) to better illustrate the differences between each maze type.
Conditional Path Maze - (sometimes called a Colored Path Maze) A maze where the paths that can be taken are subject to the conditions of the maze maker. Typically this involves a sequence of colored pathways that can only be taken in a specific order.
How to Make a Conditional Path Maze
Step 1 - Draw the Decision Stations
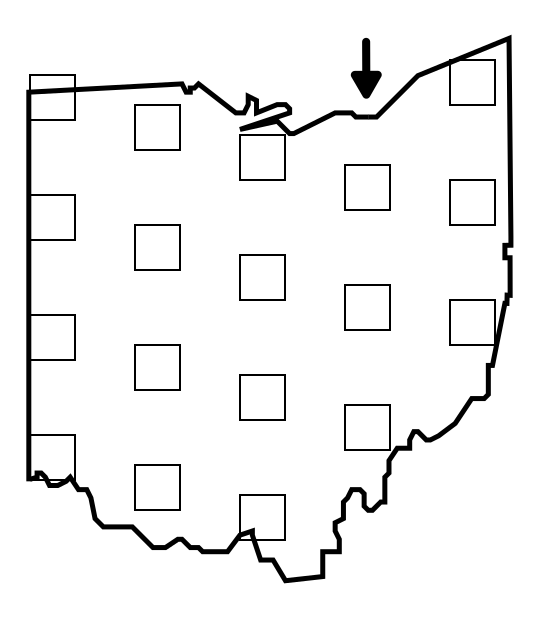
A conditional path maze does not NEED an outline, in fact most will not have an outline….but it does need decision stations. For my example, to be consistent I used an outline of Ohio and created decision stations in that general shape. I deleted the Ohio outline in the next step. Space the decision stations far enough apart a pathway can be drawn between them.
Step 1.5 - Choose the Start / Goal (goal is optional)
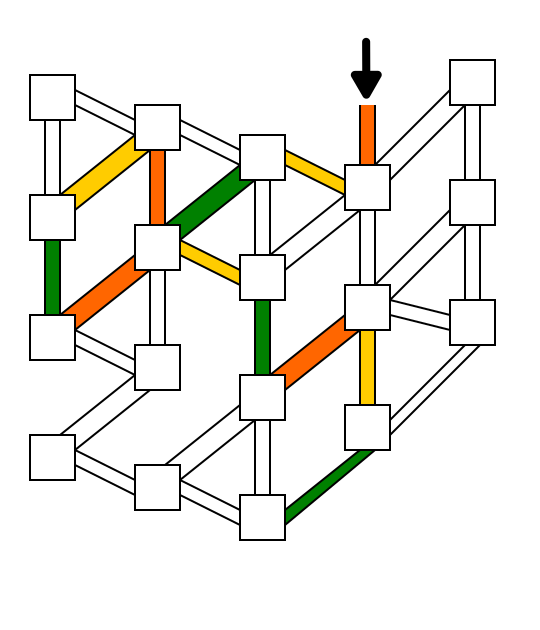
For the below example I chose the start of Cleveland. I prefer to choose the goal later as I construct the maze based on how difficult I want it to be to solve. I want to also note that I used an arrow and an initial pathway to start the maze. I could have also used a block with the word “START”. This would mean that the initial move is not set, but will most likely have multiple options (further explained in step 2).
Step 2 - Draw Pathways between the Stations
Draw pathways between the decision stations. I do not connect every station to every nearby station. Leave a few open. As you build the solution and false pathways you can adjust these as needed. I find it’s better to have less pathways to start than more. Following up on the discussion above, had I opted for “START” in the first block used the solver would have 3 options to move in (pre colors added of course, but had I chosen that START I would have made at least 2 of them possible first moves).
Step 3 - Create a Solution
Starting from the entrance color pathways to create a solution. Because this is a Conditional Path maze you will need to decide what those conditions are. In my below example it is to solve the maze by moving from orange to gold to green pathways. Don’t worry, we will add the instructions in a later step. To make the maze more fun and difficult I suggest you loop the solution thru a block more than once. In row 2 the second block from the top is visited twice.
Step 4 - Create False Pathways
Continue to color pathways, giving the solver additional options to move from one station to another. Add and delete pathways as needed. I well designed maze will create confusing loops that take the solver down false paths. In the example below I also added a final pathway to the goal. Similar to the discussion above on START, I could have used a GOAL block instead of the exit pathway and arrow.
Step 5 - Complete the Maze
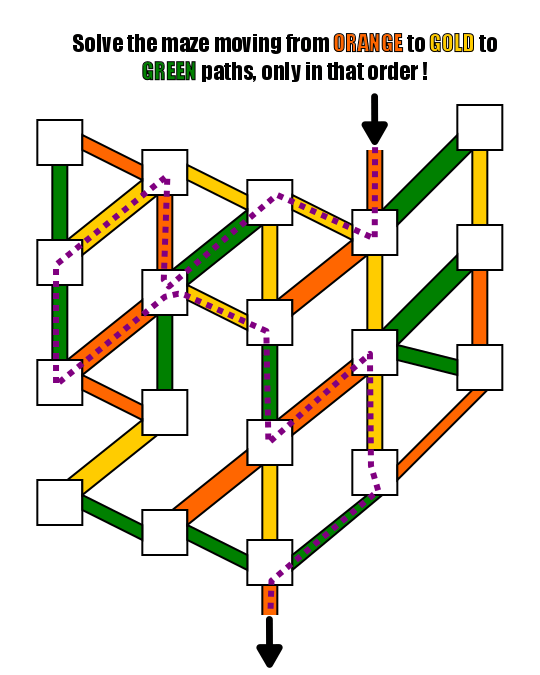
Add directions to the maze to complete it, telling the solver the conditions for solving.
Step 6 - Make the Maze Solution
Highlight the correct path in the final version of the maze to create the final maze solution (shown here as a purple dashed line). If your pathways have multiple possible solutions, mark the best (shortest) solution. I also like to set this maze type to the side for a week and try to solve it later to see how complex it is.
Additional Conditional Path Maze Examples
Here is another example of a Conditional Path maze. Notice that the stations again do not have pathways to every nearby station, only select ones.
My next example was made for Kids and was done in greyscale for inclusion in a black and white book. Nothing too complicated as there are not many moves available to make.
Comparison of Conditional Path Maze vs Color Grid Maze
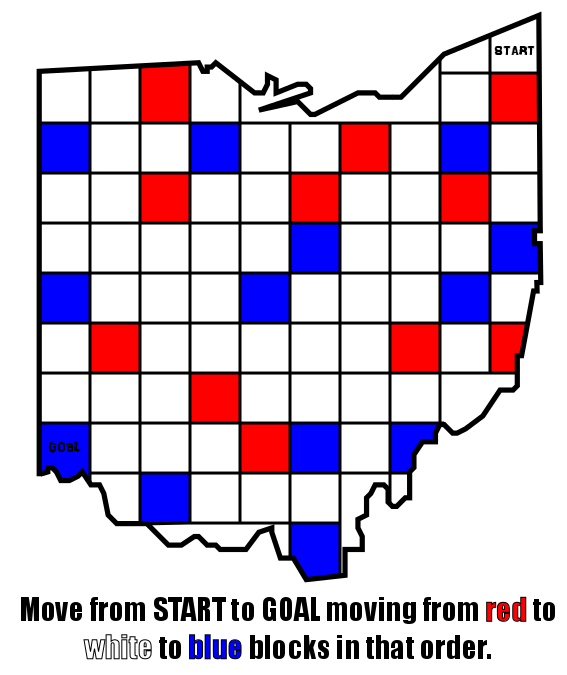
Compare the above Conditional Path maze to it’s sibling, the Color Grid maze. Each uses conditional movement to move from start to goal, but the structure is grid based vs. path based. A color grid maze also has much more open movement with a grid away from a wall being able to use 8 directions when it is landed on.
I did a 3 part blog series on maze constructions if you want to design your own type of maze. Part 3 includes all of the conditional maze options.
Part 1 - Starting and Ending a Maze - Speaks to the 9 most popular ways to start and stop a maze
Part 2 - Maze Path options - Explores the 12 different pathway options for a maze
Part 3 - Conditional Path options - Speaks to 11 different conditional options to add to a maze to make it more enjoyable
Interested in learning how to make or draw other types of digital mazes ? I have step by step instructions on how to make over 40 different maze types.
If you prefer making labyrinths, you can find step by step labyrinth making instructions.


