Maze Art: Advanced Tips to Creating Your Own Masterpiece

So you want to make some maze art. I’m here to help. I will take you through some things to think about and give you tips to make the best possible mazes. I can’t construct a maze for you, and while maze art, like all art is subjective, my goal is to help you make your mazes more interesting. Ideally, you will layer on your own particular style and make beautiful mazes. My goal is to help you Unlock the Secrets of Maze Art.


Before we get started:

I assume you understand how to make a maze and just want advanced and specific instruction and tips. If not start with the blog post how to make a standard maze. On this website I have a section on how to make a maze includes over 40 different maze types (and there are even more types not shown made by others) if you want - browse around for some inspiration and ideas.

Maze Construction:

I also have done a series of blog posts that pull together different aspects of maze making, like starting and ending a maze that will help you see the different options and come up with a style you like. Personally I like to experiment often, but build off of 2 things: the first is making more of what I I like while the second is making mazes similar to what is successful on the site ! Tip #1 - Make lots of experimental mazes. When I initially made mazes on this website, and I used to make daily mazes, I did a large variety of maze types and constructions. I also did monthly voting where people could vote for their favorite mazes. This feedback was essential to help me find my lane. Tip #2 - Get feedback. Some options: Voting, posting mazes online in the reddit mazes forum, looking at traffic on your site by maze. I prefer to ask strangers vs. friends and family, because they tend to only give uncritical, positive feedback.

Here are the 3 blog posts that deal with Maze Construction:

Part 1 - Options for Starting and Ending a Maze

Part 2 - Maze Pathway options

Part 3 - Conditional Pathway options

And some case studies:

Using Color for Maze Pathways - A Case Study

Maze Design Case Study - Designing a Grid Maze in Different Difficulty levels

A Case Study - The Free Stamp Maze

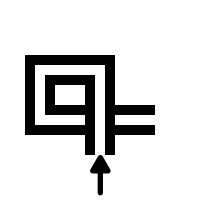
My first attempt at a how-to for making maze art is my project that made Maze of the Week #46 - The Free Stamp, located in Cleveland, Ohio. I turned this into a case study that includes step by step instructions. Let’s look at those 6 steps, each of which has a few tips in the how-to. Here I will add some additional tips specifically suggested to elevate the quality of your maze.

STEP 1 - CHOOSE YOUR MAZE SUBJECT

  • While your neighbor’s shed may make a nice maze…will anyone really care ? Tip #3 - Famous landmarks/locations/objects get more interest. 5 of my top 6 voted mazes from last year were of famous buildings. Here are some examples: The Louvre, Sydney Opera House, Rock N Rock Hall of Fame.

  • I specialize in making mazes of buildings and signs. I like them as subjects and make them well. Other maze artists specialize in cityscapes, comics, map mazes, or colorful landscapes. One thing I am terrible at is drawing faces. Human faces are difficult to draw and if you have that skill you should use it. Making a human face that is recognizable as a specific person is even more impressive, so if you have that very difficult skill - leverage it ! Tip #4 - Leverage your unique skills. This could also be Specialize in the maze types you do best.

STEP 2 - TAKE A PHOTOGRAPH OF THE SUBJECT (OPTIONAL)

  • Tip #8 - Take lots of detailed pictures of your subject. I will explain this later with an example !

STEP 3 - DRAW THE MAIN OUTLINE OF THE SUBJECT

  • When I first started making mazes I tried to have each maze fit on a standard size piece of paper. This made me leave out details I wanted to include and not optimize the shape of the artwork. Now, I make mazes that fit the subject matter- tall, short, boxy. Tip #5 - Don’t worry about “fitting” the maze into a particular size. If a maze needs more room, take it !

STEP 4 - BEGIN THE DESIGN OF THE MAZE

  • My best mazes all took the longest amount of time to make. It is not a perfect correlation but it is definitely there. For me, the juice is worth the squeeze. Tip #6 - Slow down and take your time. Don’t rush. Take your time. Get it the way you want it.

STEP 5 - DRAW THE MAZE

STEP 6 - MAKE ANY AESTHETIC CHANGES TO COMPLETE THE MAZE - COLOR, SIZE, BORDER, TITLE

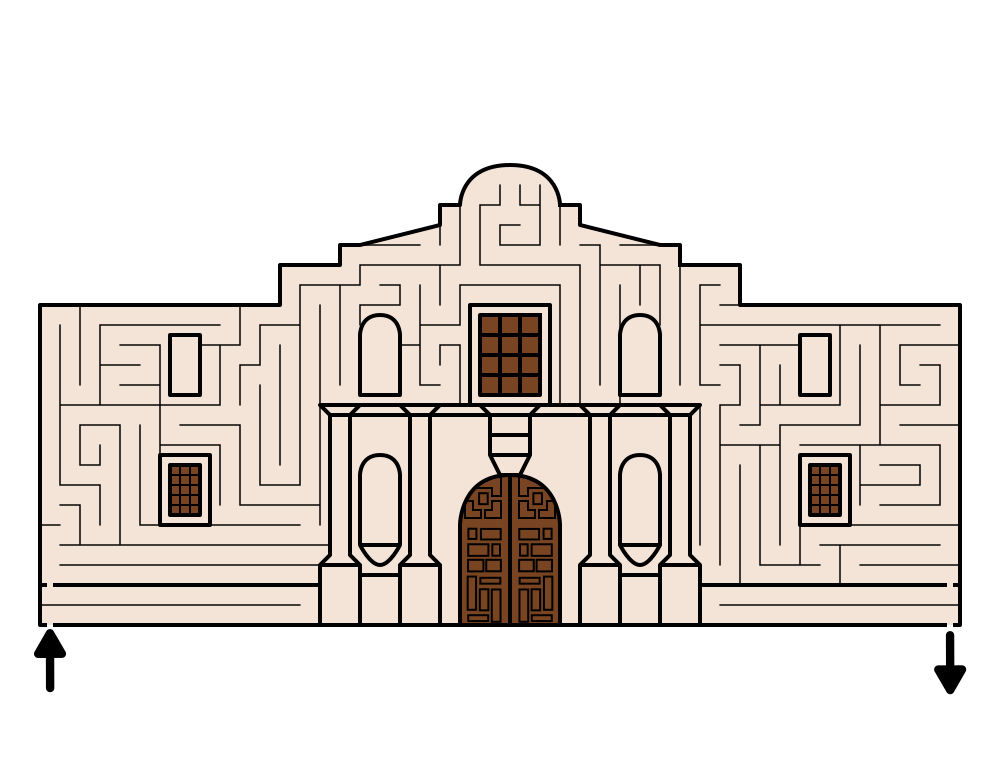
  • Not sure if this tip becomes part of step 6 or a new Step 7. Tip #7 - Add as many small details in the maze as possible. Even if they are not relevant to the solving of the maze. In my ‘how - to’ I give this example of a maze of The Alamo - and I repeat it here:

    Example 1 - a basic maze of The Alamo. I think people would recognize it without a label:

Alamo simple maze

Example 2 - a detailed maze of The Alamo:

The Alamo Mission Maze in Color

Do I even need to comment on which maze has been more popular ? Both are recognizable as the Alamo Mission.


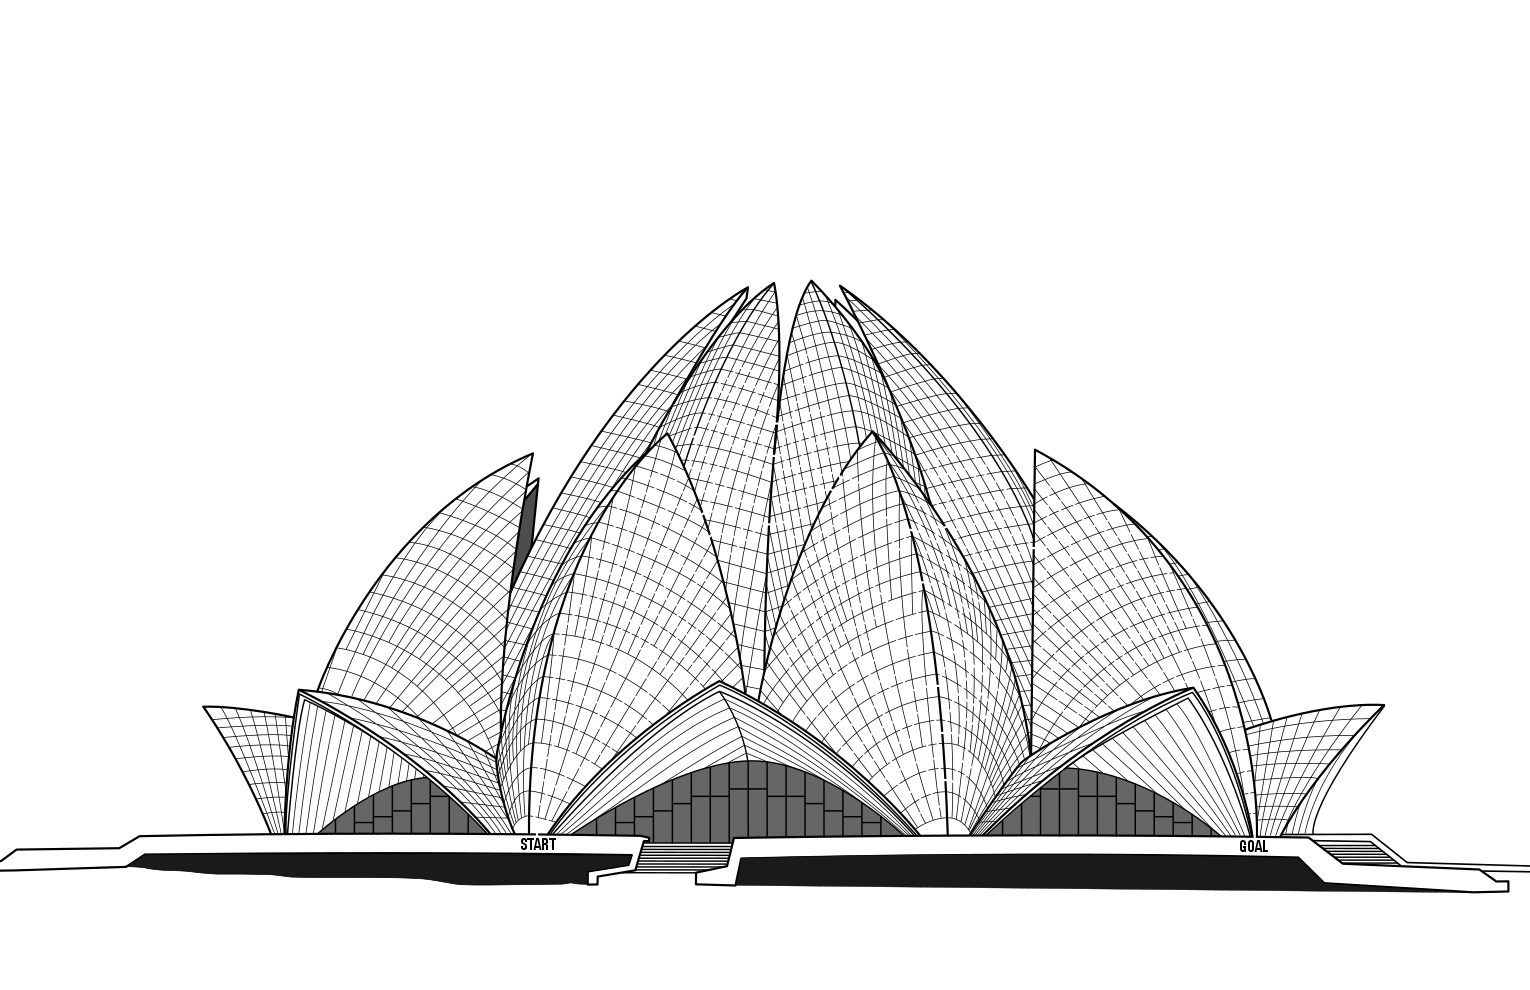
Added detail includes the use of shadowing. Depending on your subject matter this could become it’s own tip (Consider adding shadows) It is the #1 thing I struggle with adding or not adding to a maze…here is an example where the use improved the finished product, the Lotus Temple Maze.

The maze with shadows:

Lotus Temple maze

And without shadows:

Lotus Temple maze no shadows

When I was making this I thought I was done with the bottom version but after I experimented with shadows I knew that would become the superior version.

Another example:
I decided to make a maze of a church near my house. I went to the church and took a picture from an angle that I thought would look good. I went through the steps of making the maze…and when I got about 80% done I went back to the church and took more pictures (close-up this time) of items on the church and the surrounding area that could be included in the maze. That maze has not yet been published, but here is a collage of some of the details I added ! Similar to the Alamo example, without these details the maze is still good, but adding details enhances the interest in the maze. Tip #8 - Take lots of detailed pictures of your subject.

Photo collage of church details

Additional example: The Louvre

This was one of my most popular mazes. A world famous building that everyone knows. But look at it closely. The maze is completely housed in the pyramid. This part of the maze was easy to make. The details of the other buildings of the Louvre in the background have nothing to do with the maze, but without them this maze is completely different. Those buildings took more time to create and draw but really change the maze. Let’s compare them:

The Louvre Maze

Compare to this version:

The Louvre Maze no background

Nio background buildings

A few of you might prefer the 2nd cleaner version….but without the label do you know that is the Louvre Museum ? You know it is a pyramid, and a modern one because of the straight lines/edges, but that’s about it.

Tip #9 - Know what you are drawing. Sounds obvious but it is not. I realized this myself while making some of my own mazes. The best example to illustrate this is if I asked you to draw a brick wall. Let’s look at the most common way this would be done below. Looks like a brick wall.

brick wall in black and white

Brick Wall

What did I draw ? I did not draw bricks. I drew the mortar. Maybe it is not important, but maybe it could be. And what did I draw below ? Bricks in a brick wall. Know what you are drawing !

Brick wall outline in burgundy

I hope my 9 tips help you make your own masterpiece !

Types of Maze Intersections and Junctions

Want to know what types of intersections will you find in drawn mazes ? Are you an artist or a maze solver ? Below is a partial list with examples of the types of pathways and junctions that can be made to create a drawn maze using mostly a grid-like pattern. Slight variations of these would exist for non-grid maze creations also, like hand drawn, triangular, hexagonal, etc. Lets’ start with the most simple part of the drawn maze.

I break maze intersections and junctions into 6 categories:

  1. No Choice Pathways

  2. Intersections

  3. Spirals

  4. Loops and Branches

  5. Dead Ends

  6. Special Pathways

Let’s look at each of these categories with details, and examples.

No Choice Pathways:

  • The Main Path or Main Passageway

Looks like a standard straight line. There are no choices to make other than to continue forward on the path you are on. Not a junction or an intersection really, but what you are on before you get to one and so a great place to begin.

Main pathway.png
  • The Left or Right Turn

No choice is available, but the main path turns to the left or right to change the direction of the solver. Not a junction or intersection, just a new direction for the main pathway. Happens countless times in a maze !

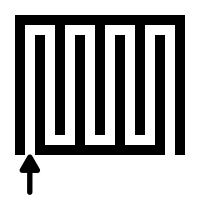
  • The Back and Forth

This stands in for all possibilities of patterns with no choices - and there is an infinite amount ! If you break it down it is just a pathway with many turns and because there are no choices it is in some ways filler. I would define this one as a series of pathways and turns that move the solver back and forth on the pathway without any choice of direction as in a labyrinth. A very common pathway configuration.

Back and Forth.png

Intersections:

  • The Standard Intersection -

Looks like a plus sign to the solver. At an intersection the solver must decide between turning left, right or continuing to go straight on the current pathway. A standard intersection has 3 choices (4 if you think returning the way you came is a good idea).

Standard Maze Intersection
  • The T - intersection -

The main path comes to a junction where the maze solver has two choices and needs to go either left or right. Looks like a T (but can also be a T on its side if you are traveling on the same pathway). The main pathway in this junction ends, so continuing the way you came is not an option. A choice must be made.

T Intersection.png
  • The Take or Continue intersection -

The standard and most common choice you will have to make many times in a maze. Looks like a T on it’s side, and can go in any direction as long as the main pathway continues on (this is what sets this intersection apart from the T - intersection above). A decision needs to be made to continue on your path or turn onto another path. Below are versions to turn left or right vs. continuing on the main path.

  • The Y - intersection -

An angled version of the T intersection that looks like the letter Y. The maze solver must make a similar choice as in the T intersection. Continuing on the main path is not an option.

  • The Multi-choice intersection-

A maze solver comes to a section where the main pathway splits off into many different directions from the main passageway. Different from a standard intersection in that it can have more than 3 new options. This also has the most different options on how it can look. A maze with Multi-choice options will typically be more difficult to solve. Also, the pathway options may be spaced over a larger area. The example on the right has 7 possible paths close together that can chosen.

Multi Choice.png
  • The Fork intersection -

A specific type of multi-choice intersection - a pathway that comes to a decision intersection that breaks into 3 - 5 possible choices, all typically pointing in an onward direction, looking similar to a fork.

Fork maze intersection example

Spirals:

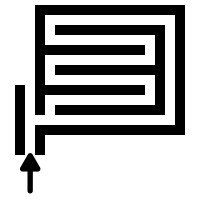
  • The Spiral or vortex -

A pathway that spirals into itself and then spirals to exit thru a series of continual left or right turns. Basic spirals do not have any intersections or junctions for the solver to choose. Often used to create a particular look for the maze.

Spiral.png
  • The Multi Spiral Path -

This is a particular type of spiral path that includes additional branches inside the spiral that may be chosen by the solver. Those new pathways eventually lead to dead ends inside the spiral with only one pathway spiraling out (although the 1 spiral out is not a strict rule).

The multi spiral
  • The Spiral Dead End -

A pathway that uses a spiral to trick the solver into a dead end. Instead of a path spiraling in and then spiraling out, you only spiral in to a dead end.

Maze Spiral Dead end example

Loops and Branches:

  • The Return Path or Looping Path -

A pathway that when taken, unknown to the maze solver will return them to the same spot by looping back around, essentially wasting the time of the solver. The pathway might take many turns, but the long term destination loops back around. In the example below the choice of leaving the main path leads to a looping path. Can be used to reduce the difficulty of the maze by replacing some dead ends with looping paths. It will make the maze longer, but more enjoyable when incorrect paths are taken. Instead of reaching dead end the solver loops !

Looping Path maze pathway example
  • The Side Branch -

A pathway taken off the main pathway that returns to the same main pathway further on in the maze. By taking the side branch the solver continues towards solving but has not taken the simplest path to reach the same point. Different from a looping path in that you do move closer to solving the maze when you take a side branch. Will never look exactly like the example below, but will have the same general structure.

Side Branch maze pathway example
  • The Optional Side Branch -

Similar to a side branch but involves an obvious choice for the solver. Very common in a Find Items Maze and an Avoid Items Maze where you may need to strategically take the optional side pathway to fulfill a condition of solving the maze (example: maze instructions are to find all the balls and then exit the maze - and a ball is on the optional side branch). While the side branch above is taken unknowingly, this is taken with strategic intention (often because it is obvious).

Side branch option.png

Dead Ends:

  • The Dead End -

A pathway that can no longer be traveled on because it has ended. The solver loses and the maze maker wins…I would be surprised if the dead ends you encounter are ever as easy as the example below to see before you reach the end.

Maze dead end pathway example
  • The Filler Dead End -

This is a particular type of dead end that is made by a maze maker with the only purpose of filling up space. Often it is unintentional in the greater design of the maze and no maze solver would ever take these mini paths. They truly are filler. A dead end path that no human would ever take.

Filler maze pathway dead end example

Special Pathways:

  • The Weaving Pathway -

Used in Weaving Path Mazes and Pipe Mazes, this path does not dead end when a wall is encountered if the pathway you are on continues directly on the other side of the pathway that it crosses. It is a way of making 3D movement part of a maze that is drawn on a 2D dimension like a piece of paper or computer screen. To help some solvers they can optionally be shown with arrows to indicate movement across pathways (example on the right). These are fun pathways to include in a maze but can be difficult to design without some practice. In fact if you like games where you need to observe mistakes, I wrote a post where you need to find my weaving design mistakes !

Weaving Pathway Maze
Weaving Maze Pathway with arrows
  • The Trail Path -

Used in Hidden Message mazes, Letter mazes and Number mazes. In this pathway movement along the pathway “captures” letters or numbers as you go over them in the pathway. So the solver is not avoiding the letters, but rather collecting them. In the example below from the start the different possible movements create different words, going clockwise: Straight : “THEN” ;Straight, right “THERE” ; Right “THY”; Left, Down “THATS”; Left “THANK YO”.

Trail path maze example
  • Random Shaped Pathways -

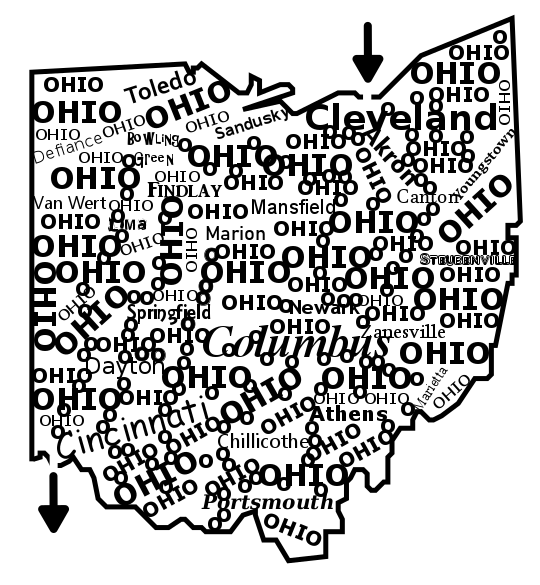
    Most commonly found in mazes that are drawn by hand or that use objects as the walls of the maze. Pathways meander more than normal and have irregular shapes depending on what object is used to make the walls. In the example below how would you define the pathways and intersections ?

Maze of Ohio filled with words as walls

I did a 3 part blog series on maze constructions if you want to design your own type of maze. Part 2 speaks about pathway options including weaving pathways !

Part 1 - Starting and Ending a Maze - Speaks to the 9 most popular ways to start and stop a maze

Part 2 - Maze Path options - Explores the 12 different pathway options for a maze

Part 3 - Conditional Path options - Speaks to 11 different conditional options to add to a maze to make it more enjoyable